Showing posts with label baked donut. Show all posts

20 October 2017

Ginger Cake Donuts


I suspect most people will associate gingerbread with Christmas and Winter, but for me it is one super Autumn-ey flavour and perfectly nice for this time of year. With October truly on it's way and the Cake Slice Bakers time of the month swinging around, there was no doubt in my mind what I was baking when it came to choices. 

The Ginger Cake is, as Roger Pizey in World Class Cakes, puts it "super-charged". While I omitted the Ginger Wine called for in the original recipe, the rest stayed the same. I had never heard of Ginger Wine, and couldn't find it readily so it didn't make the cut. I added a sweet cinnamon, cream cheese frosting instead. The Donuts were beautifully balanced and based on the oh-ahs that accompanied the tasters lip smacking, I trust they went down a treat. 

I had a half of one, trying to be good and not deviating too far off my build-me-some-muscle gym plan. But honestly every time I meet my trainer he's asking what I have baked this week so I can never get away from it! My work colleagues are the same. It's like they want me to bake and complain I am making them put up weight.

And I love them for it. 


Ginger Cake Donuts- 
makes 18 donuts. Adapted from World Class Cakes page 70

170g butter
200g dark brown sugar
2 tbsp corn syrup
2 eggs
160ml whole milk
290g self raising flour
2 tsp ground ginger
75g chopped crystalised ginger

Preheat your oven to 325F/160C or Gas mark 3.
Spray a donut pan with non stock spray and leave to one side.
Melt the butter, sugar and corn syrup over a low heat.
Whisk the eggs into the milk. Add this to the melted butter. Mix to combine.
Sift the flour with the ginger and add the crystallized ginger. Add this to the wet ingredients and mix until just combined and smooth.

Fill a piping bag with the mixture and pipe in the donut holes until just before the fill line. Bake in your preheated oven for 13-15 minutes until the tops spring back when touched.

Allow to cool for a few minutes in the pan before tossing out and allow to to cool fully on a wire rack.

Make the frosting.


Cinnamon, Maple Cream Cheese Frosting 

30g full fat cream cheese
1 to 2 tbsp whole milk
1 tbsp maple syrup
125g icing sugar
1/4 tsp cinnamon

Add all the ingredients into a bowl and mix until smooth. If you need more milk to make it wetter, add in one tablespoon at a time until the desired consistency is reached.

Once the donuts have cooled, dip in each one and allow to dry on a wire rack.

*** of course I don't have a picture of the finished forsting before dipping.. It was all too exciting!


Whaadya think?

Pretty autumnal right! Be sure to check out the linky below and see what the other bakers made this month. Happy baking folks!


20 January 2017

Devil's Food Cake with Chocolate Espresso Frosting (Dairy Free)


Time of the month again round these parts folks... and no this is not me over sharing but rather an introduction (or a gentle reminder to those seasoned reader) to the 20th of each month where The Cake Slice Bakers and I pick a recipe from  a choice of 4, from our latest book to bake and share with you all. This month we are still hopping through World Class Cakes by Roger Pizney and I have to say I am loving it.

Dietary restrictions dictated the recipe this month, but what I found was that the Devil's Food Cake (pg 44) I did decide to bake up, lent itself beautifully to a dairy free option. A very good friend of mine has a son with severe dairy allergies and I always want to come up with variations for him.. I figured I would give this a go in his honour and boy, was I delighted with the outcome.

I did not follow the direction for the frosting that accompanied the cake batter recipe. While I have no doubts that the frosting was delicious, I couldn't in good conscience use half a dozen egg yolks in a single frosting. January is always the month we tighten up and start our new year budget.. and the budget didn't stretch to six egg yolks going into ONE frosting. Another time maybe, but not this month I'm afraid.

I adapted an espresso glaze to suit the dairy free conditions of the bake, and bobs your uncle.. these donuts were born. They are also part of my "baking on a budget" notions, with all ingredients bought in Aldi and proof, again, that name brand ingredients can bake a perfectly perfect bake!


Devil's Food Cake- adapted from page 44
Makes 18 donuts or 2 8' round cake layers

35g cocoa powder
65ml boiling water
85ml almond milk
125ml vegetable oil
230g caster sugar
2 eggs (lightly beaten)
225g self-raising flour
1/2 tsp baking soda
1/4 tsp salt

Preheat your oven to 350F, 180C/160C fan, or Gas mark 4. Spray a 12 or 6 cavity donut pan with baking release spray and set to one side.
Mix the cocoa powder with the hot water and leave to cool.
Cream the sugar with the oil and add the eggs followed by the vanilla. Mix together, scraping down the sides of the bowl as you go.
Sift the flour, salt and baking soda together.
Slowly add the milk to the cocoa/water  and mix until combined.
Alternating between the flour and the cocoa powder, mix the two into the egg and oil mixture until fully combined.

Transfer the batter to a piping bag and pipe circles into your donut pan, until 2/3 full. Pop in the oven for 10-12 minutes.

Remove from the oven, leave to cool in the pan for a few minutes before popping out onto a wire rack to cool completely.


Chocolate Espresso Glaze- enough for 12 donuts

125g dark 70% chocolate
2 tbsp coconut oil
450g icing sugar
4-5 tbsp strong coffee

In a heat proof bowl melt the chocolate and the coconut oil.
Add the icing sugar and coffee and using an electric mixer, whisk until combined to a shiny glaze.

Once the donuts are cooled, dip in each one to totally glaze over the top of your donut. Leave to dry for a few minutes on a wire rack.


I absolutely adore how these turned out.. I am so delighted that the cake recipe adapted so nicely to suit a dairy allergy and I have another recipe to add to my allergens list! The things you learn with The Cake Slice Bakers!


11 December 2016

Double Chocolate, Mint Chip Baked Donuts


I shared these over on my Instagram and they got such a huge reaction that I said I would show you how to do it also... You know, because you guys have nothing else to be doing, two weeks to Christmas!!

Anyway I am in full swing with making and baking gifts for family and friends and while these dounts were supposed to be shared with friends, they never actually made it there.. ooops.. insert embarrassed emoji here.. but were enjoyed by friends who happened to call.

Don't you love that feeling when you have baked and the house is really tidy and super Christmassy. And you get to thinking, now... NOW is the time for impromptu callers who will think I have it all sorted and my life together! But they never do call that day, do they?

They call the day after, with day after donuts and the house not as neat as before. But I am not fussing.. I had donuts and they were happy. And friends called over and that made me even happier than having the house neat and dounts baked put together!!


Chocolate Donuts- 
helps if you have a donut pan…

225g caster sugar
2 eggs
275g self raising flour
1 teaspoon baking powder
100g coco powder
50ml hot coffee (I used decaf for the kids)
100g melted chocolate (at least 50%)
125ml buttermilk
125ml vegetable oil
1 teaspoon vanilla paste

Preheat your oven to 180C/350F or Gas Mark 4 and spray two 6 hole donut pans with bake release, leave to one side.

Beat the eggs with the sugar until fully incorporated and looking light and fluffy.
Add the vanilla.
Sift your flour, coco powder and baking powder together and leave to one side.
Melt the chocolate in with the hot coffee. Stir until smooth.
Add one third of your dry ingredients to the eggs and sugar and combine slowly.
Add the milk.
Add one third of your dry mix again, mixing until just incorporated.
Add the oil.
Add the coffee and chocolate and mix again, slowly until just combined.
Fold in the remaining one third of the dry ingredients by hand using a rubber spatula. This way you ensure it stays light and fluffy and you don't over mix the batter.

Scoop the mix into a zip lock or frosting bag, snip off the end and squeeze the batter into the rings of the donut pan. Fill to about two thirds full.

Bake for 10-12 minutes or until a skewer inserted inside comes out clean. Leave to cool in the pans on a wire rack for about 10 minutes. Remove  from pans and allow to cool fully before dipping.


Chocolate Dipping Sauce

100ml (thick) double cream
150g dark chocolate (at least 60%)

Break the chocolate up and put it in a heatproof bowl. 
Heat the cream in a pot on the hob, but do not let it boil… rather come to just before the boil. A slight simmer, with small bubbles breaking on the top.  
Pour the cream over the chocolate and cover the bowl with a plate to retain the heat. 
Allow the warm cream to melt the chocolate for about 5 minutes and then stir it all together. 
Allow it to cool down, slightly and when your donuts have sufficiently cooled… dip the neat rounded side in to fully coat that side of the donut. 

You will need to lick your fingers. 


Sprinkle the tops with Andes Mints baking chips or your choice of chip or sprinkle and ENJOY. 


Tell me what you are making for family and friends... I love to hear how others incorporate homemade into their Christmas traditions! I am sharing more ideas etc over on Instagram... why not join in the fun and follow!?

Until next time folks... Have a great week! X

25 February 2016

Birthday Cake


My brother and I were born on the exact same date, 7 years apart. So a little bit like twins, we share a birthday. Every year. We have to share. And it's a good thing I am OK with sharing too because I love celebrating birthdays. With cake and tea parties and the like. 

My brother... he has a very special birthday this year. His 40th and that required a very special cake. But he's a guy with simple tastes. He likes buttercream and he likes raspberry jam. It's not much to go with really.. but I did what I could and this is what I came up. 

It was sort of my birthday cake too. So I guess the fussy outside speaks of me while the flavour combination speaks of my brother. See, that's me sharing. 

Again. 


It's not actually that elaborate. Basically it's a dressed up vanilla and jam sponge. And considering you could buy most of the toppings ready made, it's really fools play. I however made all the decoration from scratch, but that's how I roll.  If you are any way decent at putting two layers of cake one on top of the other, sandwiched with buttercream and jam... then you will be able to do this.

It's not that difficult to do.


White Chocolate and Raspberry Birthday Cake

The Cake- Makes two 6 inch, deep pan cakes- for anything bigger i.e. 8 inch pans,  I suggest doubling  the recipe.

125g salted butter
225g caster sugar
275g self raising flour
3 large eggs 
125ml buttermilk
1 tsp baking powder
1 tsp of vanilla extract

Line two 6 inch cake tins with parchment and leave to one side. Preheat your oven to 350F, 180C or Gas mark 4. 

In a bowl cream your butter and sugar until light and fluffy and pale.
Add in an egg, one at a time until the yolk has disappeared. Then add the next, scraping down the sides of your bowl.  
Dry whisk or sieve your flour and baking powder together.
Add the vanilla to the egg/sugar/butter combination.
Add half your dry ingredients to the butter/sugar/egg/vanilla mix and then half the buttermilk. Mix until combined and repeat. Be careful not to over mix the batter here as you want the layers to stay light and fluffy. The buttermilk helps with that too. Just make sure all the ingredients have been mixed together.
Fill your cake tins to about half full, each, and bake in a preheated oven on the middle shelf.
Bake for 20 to 25 minutes. You'll know when they are done as the tops are golden, have a slight spring when you gently push down on the top or a skewer inserted in the middle comes out clear. Allow to cool in the tins for about 10 minutes, then turn out onto a wire tray and allow to cool fully before filling with jam and cream. 


The White Chocolate Dripping

100ml of double cream
200g white chocolate

Break up the white chocolate and pop it into a heat resistant bowl. Heat the double cream in a small pot until just before boiling, pour over the white chocolate. Cover the bowl over with a plate and allow a few minutes for the chocolate to melt.

Stir until the chocolate and cream are fully mixed and set aside to thicken.


The White Chocolate Buttercream 

225g soft, room temperature, unsalted butter
500g sifted icing sugar
up to 60ml of the white chocolate ganche you made for the dripping.. about 4 good tablespoons

Using an electric mixer, beat the butter on high until it is very soft and pale. (TIP: pop the butter in the microwave for a few seconds until very soft.)
Add in the icing sugar a few teacups at a time.
Add a tablespoon of the ganache in until the desired texture has been reached, you might not need all of it. 
Mix the holy moly out of it until light and fluffy. The faster and longer you mix this, the lighter and fluffier it will be.


Putting it all together...


Once the cake is cool add the first layer, top side down. The underneath part is flattest. Fill with a layer of buttercream and your jam filling. Here, I picked a raspberry conserve. Add the next cake layer, again top side down. Fill in any gaps and smooth out your buttercream. Pop the cake in the fridge for a few moments, to harden the buttercream and make the cake more stable to work with.

Remove the cake from the fridge and add the buttercream to the top and sides and smooth out. I have left this semi-naked because a) I'm a tad lazy and b) that's how I like cakes to look. Using a teaspoon, spoon the chocolate right at the edge of the cake to create the drips, then fill in the middle for the top coating. Add your decorations....


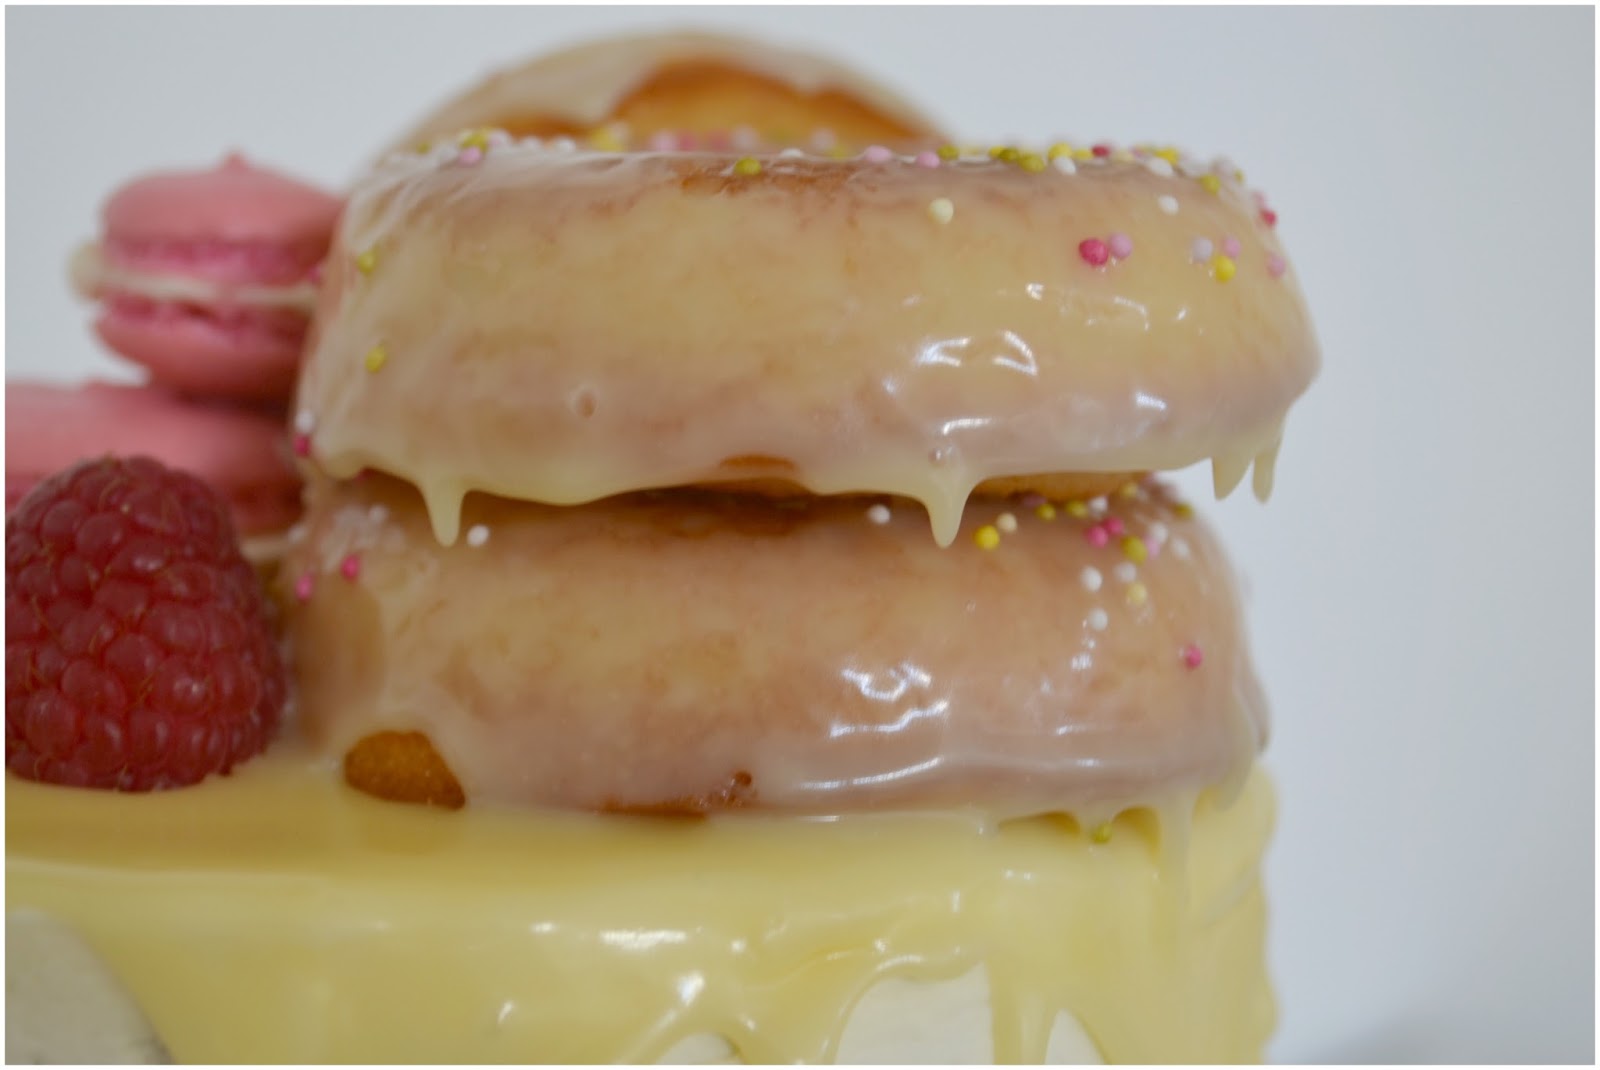
  • For the donuts you need look no further than HERE and the macarons look HERE... But look, honestly those can also be bought in supermarkets so if you are new to baking, pick your battles. Make the cake from scratch, buy the decorations. 


Honestly no need to be killing yourself. NO ONE is going to judge you if you roll up a  party with a cake looking like this.. and if they do! PPPffftttt... Turn your back and walk away. You got no time for that! You don't need that kind of negativity in your life. And those folk don't deserve your cake.


30 September 2015

Baked Buttermilk Donuts


This post can be nothing other than short and sweet because that's all that these little cuties lived. The minute they started baking, husband was in, circling the oven like a hungry wolf. The kids sniffing the air like they'd never smelt vanilla baking before... 

My pal brought me home a set of Nordic Ware Donut Pans from a recent trip to the States. I was so impressed with the quality, I genuinely couldn't wait to try them out. Seeing as I wanted to get the recipe right first time, I took to Pinterest for, ahem, "research". Three hours of my life later and armed with little more than a few scribbles on a sheet, I emerged with a multi-influenced recipe and no idea if it'd work.


I didn't actually spend three hours looking up donut recipes, I browsed EVERYTHING else. Because let's face it, the rabbit-hole-vortex that is Pinterest traps you from the get go. Coming out alive is a win in itself. 


Buttermilk Baked Donuts with a Vanilla Glaze

525g self raising flour
150g sugar
1 tsp baking powder
2 large eggs
1.5 tsp pf vanilla
55g butter (melted)
55ml vegetable oil
250ml buttermilk

Preheat oven to 180C/350F or Gas Mark 4. Liberally grease two 6-cavity donut pans with cooking spray and set to one side. Or one 12.. whatever you have.

In a large bowl whisk together the flours, sugar and baking powder together until combined.
Whisk the eggs in a medium bowl until frothy, and then stir in the vanilla. Pour the egg mixture into the flour mixture and begin stirring to combine.
Add the melted butter and the oil and fold through until just incorporated.  Now add the buttermilk and mix through until smooth. The batter is runny so it's easier to...

Scrape the batter into a piping bag and snip open the tip. Pipe the donut batter into the pan holes until they are about 2/3 full. 
Gently tap the donut pans on the counter to dislodge any bubbles.

Bake for approximately 9-11 minutes. Allow the donuts to sit in the pan for about 5 minutes before gently removing. Turn the pan upside down and gently shake it until they pop out. Allow to cool fully before dipping.

Glaze
60ml milk
240g icing sugar
1tsp vanilla extract/paste

To make the glaze: On the hob, put the icing sugar, milk and vanilla in a small pot over medium heat until melted and combined. Dip each donut into the glaze, allowing excess to drip off on a wire rack over a piece of baking parchment. 
Immediately sprinkle with er, sprinkles as the glaze crisps super fast. Reheat the glaze or add more milk as necessary if you need to keep it smooth.


Hopefully you will have more than three donuts to take photos with.. Hungry wolves snap these up fast! These are great but they come with a warning. The fact they are baked, tricks your mind into thinking they are healthy for you because fried donuts are... So. Bad. For. You. And these aren't fried.

All in moderation I say.. just possibly not the all 12 to yourself kind of moderation.

**opinions expressed in the post are my own, I wasn't asked to give them. I just freaking love those donut pans... and while I would have seriously loved it if Nordic Ware sent me their products to use... They haven't... yet!! (one can dream right?)**


Copyright © Procrastibake | Theme by Neat Design Corner |