Showing posts with label cake. Show all posts

26 October 2017

Zombie Unicorn Cake


Halloween in our house has always been about spooky. My kids like scary and they have always liked to dress up scary for trick or treating. We make spooky snacks and tell made up ghost stories to each other, seeing who can out do last years attempts.

This year, trying to be on trend with drips cakes and unicorns, we decided to merge the two together and add some of our own spooky flair! Zombies are a big part of Halloween conversations so why not make a Zombie Unicorn Cake? Aldi Baking helped us out along the way, providing our ingredients and the platform to make it happen!

It was so much fun coming up with what way our Unicorn Zombie would look, never mind taste but damn, did he taste delicious! Chocolate, raspberries and a super tasty buttercream brought this cake to life with very little hassle.


Chocolate Cake

150g of good plain chocolate (Try the darkest you can handle!)
225g caster sugar
150g coco powder
300g self raising flour
1 tsp salt
2 tsp baking powder
4 large, free range eggs
60ml hot and strong coffee
225ml vegetable oil
175ml buttermilk
1 tsp vanilla


Preheat your oven to 180 C/ 350 F or Gas Mark 4. 
Line three 8 inch round cake tins with parchment, or spray with some cake release spray.
Make the coffee, make yourself one and take out 60ml. Pour over the chocolate and allow to melt. When melted add the vanilla and the salt.
Beat the sugar and the eggs until light and fluffy. They will increase in size.
Dry whisk all your dry ingredients together. 
Slowly add them to the sugar/egg combination.
Add the buttermilk and mix until just combined.
Add the oil and mix until just combined.
Finally fold through the coffee/chocolate combination with a spatula.

This mix is thick but runny so you can pour it into the pans easy.. divide evenly and tap the bottom of the pan gently off the counter to get rid of any bubbles.
When you have the pans filled, bake for 30-40 minutes, depending on your oven. You'll know it's done when a skewer inserted in the middle comes out clean.

Drink the coffee you made for yourself a few moments ago.

When the cakes are cooked, allow them to cool in the pans for about 10 minutes. Then turn out onto a wire tray and allow to cool FULLY before assembling.


Raspberry Buttercream

227g soft, room temperature, unsalted butter
400g sifted icing sugar
100g of fresh raspberries
drop of black food colouring to make it a very pale grey

Using an electric mixer, beat the butter on high until it is very soft and pale. (TIP: pop the butter in the microwave for a few seconds until very soft.)
Add in the icing sugar a few teacups at a time. Mash through the raspberries, leaving them chunky and bitty and bloody looking. 

Mix the holy moly out of it until light and fluffy. The faster and longer you mix this, the lighter and fluffier it will be.


Once the cake layers are cool, sandwich each layer with a good helping of the buttercream, Finish off the sides and top of the cake with the left over buttercream. Leave to set in the fridge while you make the rest.

Bloody Ganache

100ml of double cream
200g white chocolate
couple drops of red and blue food colouring

Break up the white chocolate and pop it into a heat resistant bowl. Heat the double cream in a small pot until just before boiling, pour over the white chocolate. Cover the bowl over with a plate and allow a few minutes for the chocolate to melt.


Stir until the chocolate and cream are fully mixed, add drops or red and blue food colouring until you get your blood colour. Set aside to thicken.

Hair and Brain Frosting

227g soft, room temperature, unsalted butter
400g sifted icing sugar
1-2 tbsp milk if needed

Make another batch of buttercream as above but without the raspberries and separate it into four bowls, dying one bowl brain colour pink, a little black for the face details and the other two your choice of unicorn hair colour.


Putting it altogether...

Scoop out a piece of cake and add in a fake plastic eye. Add drips to the top of one half of the cake, allowing it to run over the edges. Pipe on the pink brain buttercream in a swirly pattern mimicking brain swirls. Pipe the other coloured buttercream on to the other side of the cake in rosettes and stars to look like unicorn hair. Pipe on the face using the grey buttercream.

Add a fondant unicorn horn and ear to the top of the cake and leave to set in the fridge.

Bring the cake to room temperature before serving.


***Disclaimer: Sponsored Post*** 
Aldi very kindly, provided me with the ingredients to bring this post together.
All comments and views however, are completely my own.

20 May 2017

Genoise and Raspberries and Cream... Oh my!!


There was no way I was going to pass up a Genoise Sponge when I saw it on The Cake Slice Bakers list this month. 

It is one of my favourite sponges, light and airy and perfect with fresh fruit and cream. I was excited to see how Roger Pizey of World Class Cakes made his and followed the instructions in earnest. 

But alas, it was pretty much the same as every other Genoise recipe I have tried. Not that that was a bad thing, but there was nothing a teeny bit special about it. I did not however, use a the sugar syrup mentioned in the recipe. I really dislike, with all my baking heart sugar syrups used on cake layers to keep them moist. My understanding is, if you have to pour sugar water onto your dried out old sponge, then your recipe is wrong. Maybe that's the novice in me and someone can enlighten... I would love to stand corrected. 

Syrups as glazes and flavours, you can proceed, but sugar water.. YUCK!!! 

What the recipe did make for though, was an exceptionally light sponge, that melted in your mouth. There was no need for the sugar syrup in my opinion. The Chantilly Cream, a basic in most kitchens was a lovely accompaniment to the raspberries, not as sweet at this time of year and which happened to be on sale in my local store this week. And good thing too as there are a lot needed for this recipe.

The recipe it self called for one 8' round. Now. looking at the pictures in the book, I did not think the cake displayed was as small as an 8 inch. But I trusted the book.. I should have went with my gut. I opted to split the batter into two 6' pans, which actually resulted in me using three 6 inch pans and then ended up with double height cakes. You will see in the pictures below, they are very deep layers. Again, not a complaint.. the cake was ate up in no time, just something that I felt coming and ignored. 


Genoise Sponge with Raspberries and Cream

6 eggs
200g caster sugar
160g plain flour
25g plain flour
30g butter, melted
500ml Chantilly cream (recipe below)
625g fresh raspberries

Preheat the oven to 170°C/325F or gas mark 3. Line two 8 inch round cake pan or three 6 inch with baking parchment.
In a large bowl, whisk the eggs until white and foamy. Slowly add the sugar and beat until the mixture has trebled in size.
Sift the flour and plain flour together and fold it, using a large metal spoon into the egg mixture, carefully.
Once incorporated, fold in the melted butter.
Pour the mixture into the prepared pans and bake in a preheated oven for 25-35 minutes or until a skewer inserted in the middles comes out clean.
Remove from the oven, allow to cool for 10 minutes in the pan and then turn out onto a wire rack to cool fully.

While the cake is cooling make the Chantilly Cream.

Chantilly Cream
500ml double cream
125g icing sugar

Whip the cream to soft peaks, sift in the icing sugar and continue to whip the cream until thick, stable ribbons form. Store in the fridge until needed. 


Putting it all Together

Once the cakes are cooled, spread a layer of the Chantilly cream on the bottom layer before arranging the fresh raspberries in circles on top.
Cover the raspberries with another layer of cream and then place the top layer of cake on the raspberries.

Spread a layer of cream on the very top (and sides if you wish) and place more raspberries. 
Serve.


So what do you think? It's worth a shot for sure.. I know it will be a hit because who doesn't love cake and cream and fruit when the summer is fast approaching!!

Have a great weekend folks!


08 March 2017

Green Ombre Layer Cake


Given that Saint Patrick's day is on the horizon, I thought it might be nice to share a cake, simple in it's virtue but packing a nice punch once cut open. This ombre layer cake, named because each cake layer is a shade, gradient lighter or darker than the next, is the perfect way to celebrate in style this feast day. 

A cinch to whip together, the cake is subtly flavoured with white chocolate and Irish Creme. Avoiding the heaviness of a traditional fruit cake or chocolate and Guinness, the light airy sponge complements the soft, fluffy frosting. Dressed in common garden variety ivy, it makes a happy center piece to your dinner party table. 


White Chocolate Green Ombre Cake

250g salted butter
450g caster sugar
525g self raising flour
4 large eggs 
250ml buttermilk
2 tsp baking powder
100g white chocolate, melted
Green GEL food colouring

Line 4 8 inch cake tins with parchment and leave to one side. If you only have two, cut out 4 parchment circles and put two aside.  Preheat your oven to 350F, 180C, 160C fan or Gas mark 4. 

In a bowl cream your butter and sugar until light and fluffy and pale.
Add in an egg, one at a time until the yolk has disappeared. Then add the next, scraping down the sides of your bowl.  


Dry whisk or sieve your flour and baking powder together.
Add the white chocolate to the egg/sugar/butter combination.
Add half your dry ingredients to the butter/sugar/egg/vanilla mix and then half the buttermilk. Mix until combined and repeat. Be careful not to over mix the batter here as you want the layers to stay light and fluffy. The buttermilk helps with that too. Just make sure all the ingredients have been mixed together.


Separate the batter into 4 bowls and colour each bowl with the green food gel. Try and keep the gradient of colour a shade off the last bowl if possible. Transfer the green batters to the tins and bake in a preheated oven on the middle shelf.

Bake for 20 to 25 minutes. You'll know when they are done as the tops are golden, have a slight spring when you gently push down on the top or a skewer inserted in the middle comes out clear. Allow to cool in the tins for about 10 minutes, then turn out onto a wire tray and allow to cool fully before filling. (If you need to reuse your tins, give them a quick wash out before you use them again).


Irish Creme Buttercream

330g soft, room temperature, unsalted butter
550-600g sifted icing sugar
60ml of the Irish Creme, or to your taste

Using an electric mixer, beat the butter on high until it is very soft and pale. (TIP: pop the butter in the microwave for a few seconds until very soft.)
Add in the icing sugar a few teacups at a time.
Add a tablespoon of Irish Creme in until the desired taste has been reached, you might not need all of it. 


Mix the holy moly out of it until light and fluffy. The faster and longer you mix this, the lighter and fluffier it will be.

Once the cake layers are cool, sandwich each layer with a good helping of the buttercream, Finish off the sides and top of the cake with the left over buttercream. Decorate or garnish your cake with some ivy or even shamrock... given the week that's in it!

Enjoy at room temperature with your favourite coffee. 


12 February 2017

Red Velvet Cake


"Red Velvet is red.
White Chocolate is white.
I have made you this cake,
'Cause I think you're alright."  

With Valentine's Day fast approaching some of you might be thinking the way to someones heart is through their stomach.. and if you are asking my opinion, I wholeheartedly agree. I have yet to experience a time where cake was not welcomed. It's a go too thing for me.. and if you happen to be on my friends-who-I-like-to-make-cake-for list, well then, you know the drill!

Are you sad? Cake. Are you happy? Let's have cake. Are we celebrating, commiserating. plain old being alive-ating.. there's a cake for that!

We don't actually celebrate Valentines in the traditional sense. No cards, flowers, chocolate... promises we don't intend to keep. But surrounded by the hubbub of the day, I guess we are influenced to acknowledge each other more, maybe make a special effort to remind each other how we feel and pretty much let husband know that things haven't changed since the first time I told him I loved him. The auld softy that I am!

This Red Velvet Cake helps with that..  yet takes a break from the norm and incorporates a luscious, yet light White Chocolate Buttercream. It screams Valentine's Day- just LOOK how much I love you, right? I made you a cake.

Eaten as part of a healthy diet, this provides way more than your recommended daily amounts of sugar. I'd say a slice covers your sugar intake for the week... But what does it matter? Calories don't count when you're in love!!


Red Velvet Cake 

Line and spray two or three 8 inch round baking pans and leave to one side. Turn your oven to 180C/160C fan/350F or Gas Mark 4.  

125g of soft butter
125g of caster sugar
275g of self raising flour
3 large eggs (free range)
125ml buttermilk
60g cocoa powder
2 tbsp (30ml) red food colouring (liquid)
1tbsp white wine vinegar
1 tsp baking soda

Cream your butter and sugar until light and fluffy. 
Dry whisk the flours.
Add the eggs into the butter/sugar mix, one at a time and mix until the yolk has disappeared. Repeat for the other 2 eggs. Scrap down the sides of the bowl as you go.
In a small bowl, mix the cocoa powder, vinegar and baking soda together to form a paste.
Add half the flour to the egg mixture, then half the milk and then the rest of the flour, just mix until combined. 
Scrap in the cocoa paste and mix until combined.
Finally add in the food colouring and mix until red throughout. 

Be careful not to over mix as you want it to stay nice and light and fluffy!

Divide the mixture between your two/three tins and pop into a pre-heated oven for 25 minutes or until darker on top or your cake tester comes out clear. Allow to cool in the tins before turning out onto a wire rack. 

Cool completely before filling.

When cool, level the cakes and keep any off cuts in a separate bowl. You could make cake crumbs out of these and use in your decoration.


White Chocolate Buttercream Frosting

225g soft, room temperature, unsalted butter
500g sifted icing sugar
50g white chocolate (melted)**
up to 60ml cream/whole milk

Using an electric mixer, beat the butter on high until it is very soft and pale. (TIP: pop the butter in the microwave for a few seconds until very soft.)
Add in the icing sugar a few cups at a time.
If the buttercream is very thick, add a tablespoon of cream or milk in until the desired texture has been reached. 
Add the white chocolate. 
Mix the crazy out of it until light and fluffy. The faster and longer you mix this, the lighter and fluffier it will be. 

** I dipped the strawberries in white chocolate as a garnish. I melted 120g of white chocolate and reckon I had about 50g of melted chocolate left over. 


Putting it all together...

Start layering your cakes topside down, sandwiching in between with buttercream. Cover the outside of the cake with the remaining buttercream and garnish with cakes crumbs and dipped strawberries. 


14 January 2017

Orange and Thyme


A short lived beauty, Blood Oranges are like regular oranges but the flesh is a beautiful pink/red. 

Not wanting to see their season go by without using them in some manner of bake, I adapted a simple vanilla cake to include the zest of the orange rind and reduced some of the juice to syrup.
 
The cake flavour is quite fresh. The orange cuts through the sugar in the frosting and the thyme from the reduction adds a subtle balance without over powering the citrus pop. An incredibly simple cake to make, using the basics in store cupboard ingredients. It’s a really nice little cake to serve with tea.


The Cake:

·         225g butter (softened)
·         225g caster sugar
·         Zest of one blood orange (regular oranges will suffice)
·         4 large, free range eggs
·         225g self-raising flour
·         1 tsp vanilla

The Syrup:

·         Juice of two blood oranges
·         Couple sprigs of Thyme
·         100g sugar

Frosting:

·         125g soft unsalted butter
·         250g-300g of icing sugar
·         Blood Orange Syrup
·         **optional a tiny drop of pink food colouring


THE CAKE: Preheat your oven to 350F, 180C (160C fan) or Gas mark 4. Line and spray with baking release, three 6 inch cake tins, or two 8 inch tins.
Cream the butter, sugar and orange zest together using an electric mixer until pale. Add the eggs one at a time and mix until fully combined. Fold in the flour using a rubber spatula until the two mixtures have come together. Fold through the vanilla.
Divide the mixture evenly between the two or three cake tins and bake in the preheated oven for 20-25 minutes. You will know the layers are done when the tops have slightly domed and a skewer inserted in the middle comes out clear.

SYRUP: On the hob, put the juice, sugar and sprigs of thyme into a pot, Bring to a low boil, ensuring all the sugar has melted. Set to one side to cool.
When the cake layers come out of the oven, gently ladle a few tablespoons of the syrup over the top of each cake. Do not use all of it, reserve some for the frosting. Let the cake layers sit for a few minutes, before removing to cool fully on a wire rack.

FROSTING: Beat the butter and 250g of icing sugar (and food colouring if using) until fully combined. Add the syrup and use the extra icing sugar if you need to thicken up the frosting.

Once the cakes are cooled, place the first layer, topside down on your serving plate. Fill the cake with a layer of frosting, following with the second (and third) cake layers. Using an offset spatula; scrap the frosting around the sides and top of the cake. Decorate with some thyme leaves. 


28 August 2016

Victoria Sponge for The Great British Bake Off


This past week has been just all GO! Two of our very good friends got married and trying to fit three layer cakes, 350 macaron and a Great British Bake Off post into my schedule alongside starting in my new school, being a Momma, wife and blogger was a big challenge. But a challenge accepted openly!

But I did it! And I am here to tell the tale... Who needs sleep anyway... hah.. hah ... zzzzzzzz...

First up, George and Lisa have been together since forever and yesterday, they tied the knot in a beautiful ceremony and full blown day out. I was honoured and entrusted with making the wedding cakes. That's right... CAKES!

These folk know what they like and I was going make sure they got what they wanted. The vintage style of the venue lent itself perfectly to the semi-naked, naked cake trend so popular these days and I was only too happy to oblige! There was Red Velvet, Carrot and Walnut and Lemon and Blueberry in the three cakes. We colour coded the macaron with the pastel rainbow colours of the invitation. Each colour had it's own flavour. lemon, lime and coconut, blackberry, damson plum and vanilla, cookies and cream and finally orange blossom.

After a total of 20 hours of baking... Can you guess where this post is going.. I am so SLEEPY!!

Before I even got started on the wedding cakes, the Great British Bake Off and the Great Bloggers Bake Off needed to be sorted out. Finding myself with some *spare* time on Tuesday and knowing the Bake Off was Classic and Cake week, I opted for a simple, yet incredibly effective Victoria Sponge with some pretty trimmings! Worked a charm, went down a treat and I didn't get one photo of the inside!

Taking that as a success!!!


Victoria Sponge
I made mine in 3, 6 inch tins but the recipe quantities were the same...

Line and spray two 8 inch round baking pans and leave to one side. Turn your oven to 180C/350F or Gas Mark 4.  

225g of soft butter
225g of caster sugar
40g of plain flour
210g of self raising flour
1 tsp baking powder
4 large eggs (free range)
3 tablespoons of cold milk (optional)

Cream your butter and sugar until light and fluffy. About 5-7 minutes with an electric mixer.
Dry whisk the flours and baking powder together. Or sieve them together.
Add the eggs into the butter/sugar mix, one at a time and mix until the yolk has disappeared. Repeat for the other 3 eggs. Scrap down the sides of the bowl as you go.
Add half the flour to the mixture, then the milk and then the rest of the flour, just mix until combined. 

Be careful not to over mix as you want it to stay nice and light and fluffy!

Divide the mixture between your two tins and pop into a pre-heated oven for 25 minutes or until golden on top or your cake tester comes out clear. Allow to cool in the tins before turning out onto a wire rack. 

Cool completely before filling. 

I layered my cakes with vanilla buttercream and strawberry jam.. I tried to do a fancy drip.. thing.. with the jam on the top but ended up messing the whole shebang up and just smoothed it around the edges instead!! Still tasted pretty damn good!


And if you have stayed here through all of that, I hope you don't feel as tired as I do. haha..

It's a good tired though, the one where you know every second was worth it. The smile on the Bride and Grooms faces as they walked in and saw the table.. Nothing will beat that feeling!!

As for the Blogger Bake-along, the fab Jenny over at Mummymishaps, is coordinating all of us again this year! The season set itself up to be a good one last Wednesday. I hope you'll join in as we go bake alongside the tent! Next week is biscuits... Gosh I love a good biscuit!


26 June 2016

American Dream Waffle Cake


There is a cafe in Dublin that I liked to go to when I was studying in Trinity. It's a small place that serves sweet and savoury crepes and waffles, with decent prices and good coffee. I have no idea what anything else tasted like in this place because all I ever ordered was this sweet waffle, with cinnamon butter, pecans, maple syrup and lashings of fresh cream. 

To be honest I am really not bothered by what anything else tastes like there either because I won't order it, and you can't make me. I am ordering an American Dream. Every. Time. You have a lot of offer Lemon Crepe and Coffee Co. .. I just won't ever know.. and I am perfectly OK with that decision.

Seeing as I live so far from Dublin, this waffle is my when-I-go-to-Dublin breakfast. But it also served as the basis for this cake, which became birthday cake for a friend of mine over the weekend. 

I am assuming it's not good for you. It felt like my arteries were closing as I baked it but damn it was good. The cake is really soft and the pecans studded throughout add a welcomed textured layer. 

The maple syrup buttercream is just to die for because everything should have maple syrup in it... I am thinking real life, Canadian maple syrup comes with addiction health warnings on the jars. I only have access to pretend maple syrup, so I can only imagine what the real stuff would do to me!! and then, we have the cinnamon butter fried waffles... awh jeeze you guys.. the best. 

Now... BIG DISCLAIMER... they are store bought and obviously not as good as homemade waffles, or a patch on the real deal from Lemon but this cake had a lot of layers to it and if you can cut a sneaky corner once or twice, why wouldn't you!?


Brown Sugar, Pecan Cake Batter


225g soft butter
225g soft brown sugar
275g self raising flour
1tsp baking powder
2 large free range eggs
100g toasted, chopped pecans
225ml buttermilk

Preheat the oven to 180C/350F or Gas Mark 4.
Line and spray with cake release, three 6 inch round cake tins or two 8 inch cake tins. (Mine pictured is with three 6 inch cake layers)
Cream your butter and sugar until light and fluffy. About 5-7 minutes with an electric mixer.
Dry whisk the flours and baking powder together.
Add the eggs into the butter/sugar mix, one at a time and mix until the yolk has disappeared. Repeat for the other egg.
Add half the flour to the mixture, then the milk and then the rest of the flour. Be careful not to over mix as you want it to stay nice and light and fluffy!
Fold in the pecans and mix until fully dispersed throughout
.
Divide the mixture between three tins and pop into a pre-heated oven for 25-35 minutes or until golden on top and your cake tester comes out clear. 
Pop onto a wire rack and allow cool for 10 minutes before turning out of the tin and allow to cool fully before frosting. 


Cinnamon Butter Fried Waffles

as many waffles as you want to adorn your cake. I used 6. (Fine.... 5 I used 5 on the cake because I ate one waffle, warm off the pan!)
100g soft butter
60g soft brown sugar
1-2 tsps cinnamon

Add everything, except the waffles to a frying pan over a low heat and allow it all to melt and fuse together.
Pop the waffles on top of the melty goodness and turn the heat up to fry off both sides of the waffle. Careful not to burn it!

Pop out onto a plate and allow to cool, go crunchy and taste of absolute deliciousness. Let them stand until you need them.


Maple Syrup Buttercream 

225g soft, room temperature, unsalted butter
500g sifted icing sugar
as much maple syrup as you want

Using an electric mixer, beat the butter on high until it is very soft and pale. (TIP: pop the butter in the microwave for a few seconds until very soft but not melted)
Add in the icing sugar a few cups at a time. If the buttercream is very thick, add a tablespoon of cream or milk in until the desired texture has been reached. 
Add the male syrup and  just keep mixing until light and fluffy. The faster and longer you mix this, the lighter and fluffier it will be.

Lick the beaters and be proud of yourself. We are nearly there. 


Putting it all together...

Once the cake layers have cooled add the first layer, top side down. The underneath part is flattest. Fill the top with layer of buttercream. Add the next cake layer, again top side down and fill in any gaps on the sides and smooth out your buttercream, repeat with the next layer.

Pop the cake in the fridge or freezer for a few moments, to harden the buttercream and make the cake more stable to work with.

Remove the cake from the fridge and add the buttercream to the top and sides and smooth out. I have left this semi-naked because a) I'm a lazy article and b) that's how I like cakes to look these days. I ran my spatula around the edge of the cake to make the little rudges and just kept going to the top. 

Very slowly, start pouring the maple syrup at the edge of the cake to create the drips, then fill in the middle for the top coating. It will go EVERYWHERE so be careful and don't be so heavy handed. 

Add your decorations if you haven't eaten them all and store in a cool dry place, like a large cake tin. 

You can keep this in the fridge but I hate cold buttercream so I think it's best eaten with a couple days of making. 


American Dream Waffle Cake... I love you. And it totally counts as breakfast cake also so don't even be thinking you have to wait until after eating a salad or something to have a slice... Get in!!

Have a great week folks!

25 February 2016

Birthday Cake


My brother and I were born on the exact same date, 7 years apart. So a little bit like twins, we share a birthday. Every year. We have to share. And it's a good thing I am OK with sharing too because I love celebrating birthdays. With cake and tea parties and the like. 

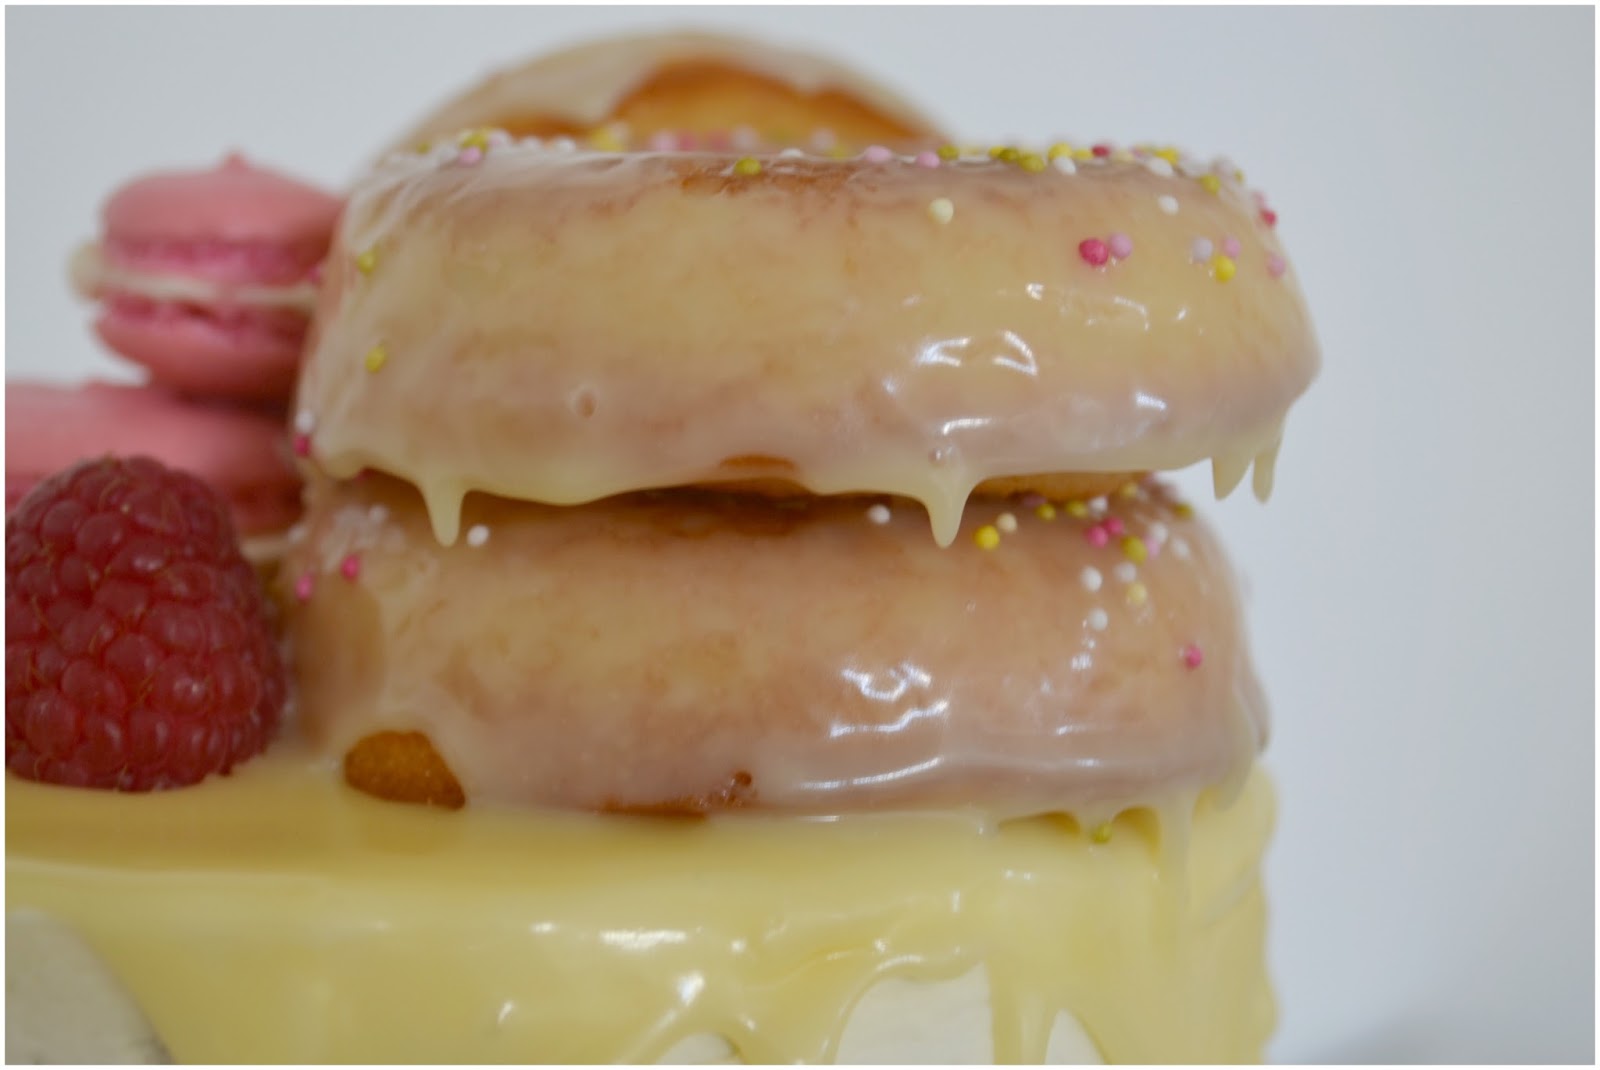
My brother... he has a very special birthday this year. His 40th and that required a very special cake. But he's a guy with simple tastes. He likes buttercream and he likes raspberry jam. It's not much to go with really.. but I did what I could and this is what I came up. 

It was sort of my birthday cake too. So I guess the fussy outside speaks of me while the flavour combination speaks of my brother. See, that's me sharing. 

Again. 


It's not actually that elaborate. Basically it's a dressed up vanilla and jam sponge. And considering you could buy most of the toppings ready made, it's really fools play. I however made all the decoration from scratch, but that's how I roll.  If you are any way decent at putting two layers of cake one on top of the other, sandwiched with buttercream and jam... then you will be able to do this.

It's not that difficult to do.


White Chocolate and Raspberry Birthday Cake

The Cake- Makes two 6 inch, deep pan cakes- for anything bigger i.e. 8 inch pans,  I suggest doubling  the recipe.

125g salted butter
225g caster sugar
275g self raising flour
3 large eggs 
125ml buttermilk
1 tsp baking powder
1 tsp of vanilla extract

Line two 6 inch cake tins with parchment and leave to one side. Preheat your oven to 350F, 180C or Gas mark 4. 

In a bowl cream your butter and sugar until light and fluffy and pale.
Add in an egg, one at a time until the yolk has disappeared. Then add the next, scraping down the sides of your bowl.  
Dry whisk or sieve your flour and baking powder together.
Add the vanilla to the egg/sugar/butter combination.
Add half your dry ingredients to the butter/sugar/egg/vanilla mix and then half the buttermilk. Mix until combined and repeat. Be careful not to over mix the batter here as you want the layers to stay light and fluffy. The buttermilk helps with that too. Just make sure all the ingredients have been mixed together.
Fill your cake tins to about half full, each, and bake in a preheated oven on the middle shelf.
Bake for 20 to 25 minutes. You'll know when they are done as the tops are golden, have a slight spring when you gently push down on the top or a skewer inserted in the middle comes out clear. Allow to cool in the tins for about 10 minutes, then turn out onto a wire tray and allow to cool fully before filling with jam and cream. 


The White Chocolate Dripping

100ml of double cream
200g white chocolate

Break up the white chocolate and pop it into a heat resistant bowl. Heat the double cream in a small pot until just before boiling, pour over the white chocolate. Cover the bowl over with a plate and allow a few minutes for the chocolate to melt.

Stir until the chocolate and cream are fully mixed and set aside to thicken.


The White Chocolate Buttercream 

225g soft, room temperature, unsalted butter
500g sifted icing sugar
up to 60ml of the white chocolate ganche you made for the dripping.. about 4 good tablespoons

Using an electric mixer, beat the butter on high until it is very soft and pale. (TIP: pop the butter in the microwave for a few seconds until very soft.)
Add in the icing sugar a few teacups at a time.
Add a tablespoon of the ganache in until the desired texture has been reached, you might not need all of it. 
Mix the holy moly out of it until light and fluffy. The faster and longer you mix this, the lighter and fluffier it will be.


Putting it all together...


Once the cake is cool add the first layer, top side down. The underneath part is flattest. Fill with a layer of buttercream and your jam filling. Here, I picked a raspberry conserve. Add the next cake layer, again top side down. Fill in any gaps and smooth out your buttercream. Pop the cake in the fridge for a few moments, to harden the buttercream and make the cake more stable to work with.

Remove the cake from the fridge and add the buttercream to the top and sides and smooth out. I have left this semi-naked because a) I'm a tad lazy and b) that's how I like cakes to look. Using a teaspoon, spoon the chocolate right at the edge of the cake to create the drips, then fill in the middle for the top coating. Add your decorations....


  • For the donuts you need look no further than HERE and the macarons look HERE... But look, honestly those can also be bought in supermarkets so if you are new to baking, pick your battles. Make the cake from scratch, buy the decorations. 


Honestly no need to be killing yourself. NO ONE is going to judge you if you roll up a  party with a cake looking like this.. and if they do! PPPffftttt... Turn your back and walk away. You got no time for that! You don't need that kind of negativity in your life. And those folk don't deserve your cake.


Copyright © Procrastibake | Theme by Neat Design Corner |