"Red Velvet is red.
White Chocolate is white.
I have made you this cake,
'Cause I think you're alright."
With Valentine's Day fast approaching some of you might be thinking the way to someones heart is through their stomach.. and if you are asking my opinion, I wholeheartedly agree. I have yet to experience a time where cake was not welcomed. It's a go too thing for me.. and if you happen to be on my friends-who-I-like-to-make-cake-for list, well then, you know the drill!
Are you sad? Cake. Are you happy? Let's have cake. Are we celebrating, commiserating. plain old being alive-ating.. there's a cake for that!
We don't actually celebrate Valentines in the traditional sense. No cards, flowers, chocolate... promises we don't intend to keep. But surrounded by the hubbub of the day, I guess we are influenced to acknowledge each other more, maybe make a special effort to remind each other how we feel and pretty much let husband know that things haven't changed since the first time I told him I loved him. The auld softy that I am!
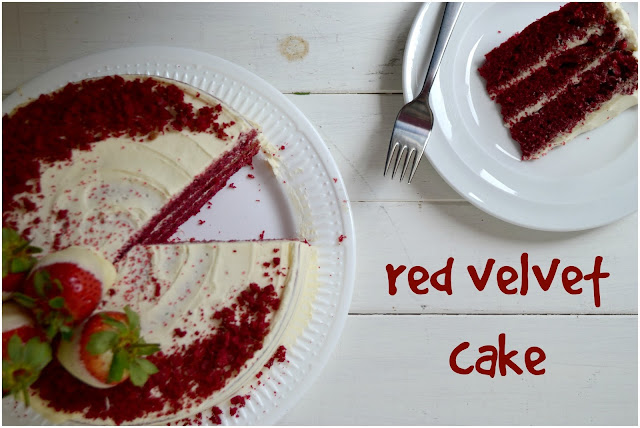
This Red Velvet Cake helps with that.. yet takes a break from the norm and incorporates a luscious, yet light White Chocolate Buttercream. It screams Valentine's Day- just LOOK how much I love you, right? I made you a cake.
Eaten as part of a healthy diet, this provides way more than your recommended daily amounts of sugar. I'd say a slice covers your sugar intake for the week... But what does it matter? Calories don't count when you're in love!!
Red Velvet Cake
Line and spray two or three 8 inch round baking pans and leave to one side. Turn your oven to 180C/160C fan/350F or Gas Mark 4.
125g of soft butter
125g of caster sugar
275g of self raising flour
3 large eggs (free range)
125ml buttermilk
60g cocoa powder
2 tbsp (30ml) red food colouring (liquid)
1tbsp white wine vinegar
3 large eggs (free range)
125ml buttermilk
60g cocoa powder
2 tbsp (30ml) red food colouring (liquid)
1tbsp white wine vinegar
1 tsp baking soda
Cream your butter and sugar until light and fluffy.
Dry whisk the flours.
Add the eggs into the butter/sugar mix, one at a time and mix until the yolk has disappeared. Repeat for the other 2 eggs. Scrap down the sides of the bowl as you go.
In a small bowl, mix the cocoa powder, vinegar and baking soda together to form a paste.
In a small bowl, mix the cocoa powder, vinegar and baking soda together to form a paste.
Add half the flour to the egg mixture, then half the milk and then the rest of the flour, just mix until combined.
Scrap in the cocoa paste and mix until combined.
Finally add in the food colouring and mix until red throughout.
Scrap in the cocoa paste and mix until combined.
Finally add in the food colouring and mix until red throughout.
Be careful not to over mix as you want it to stay nice and light and fluffy!
Divide the mixture between your two/three tins and pop into a pre-heated oven for 25 minutes or until darker on top or your cake tester comes out clear. Allow to cool in the tins before turning out onto a wire rack.
Cool completely before filling.
When cool, level the cakes and keep any off cuts in a separate bowl. You could make cake crumbs out of these and use in your decoration.
When cool, level the cakes and keep any off cuts in a separate bowl. You could make cake crumbs out of these and use in your decoration.
White Chocolate Buttercream Frosting
225g soft, room temperature, unsalted butter
500g sifted icing sugar
50g white chocolate (melted)**
up to 60ml cream/whole milk
Using an electric mixer, beat the butter on high until it is very soft and pale. (TIP: pop the butter in the microwave for a few seconds until very soft.)
Add in the icing sugar a few cups at a time.
If the buttercream is very thick, add a tablespoon of cream or milk in until the desired texture has been reached.
Add the white chocolate.
Mix the crazy out of it until light and fluffy. The faster and longer you mix this, the lighter and fluffier it will be.
** I dipped the strawberries in white chocolate as a garnish. I melted 120g of white chocolate and reckon I had about 50g of melted chocolate left over.
Putting it all together...
Start layering your cakes topside down, sandwiching in between with buttercream. Cover the outside of the cake with the remaining buttercream and garnish with cakes crumbs and dipped strawberries.


This cake is so pretty. Most pictures of red velvet cake do not do anything for me but these really Make me want to tuck in. I love the decoration too what a great idea using the colourful crumbs from the trimmings
ReplyDelete