Showing posts with label macaronmonday. Show all posts

15 August 2016

Lemon and Poppy Seed Macaron


The avoidance was strong this week folks.. We are now currently down to days in my thesis-handup-countdown and let me tell you this.. I am so over spellings and grammar and editing. Snooooooreee..

I needed a little break, just a teeny, tiny time to myself where I could be creative and productive and not have to think about the correct use of the oxford comma.

I had come across a really sweet, no wait for them to dry French Macaron Recipe and gave it a quick whirl last week. It worked out well. I was very pleased with the results, but needed to work out some kinks in my oven... namely hot-spots and my oven running a little too hot.

I tweaked about the recipe, changed about the oven timings, started all over again and WOW!

You guys... It's a keeper!


Lemon and Poppy Seed French Macaron
makes 50 approx...that's 100 shells!

115g ground almonds
230g icing sugar 
140g egg whites, large free-range, room temp
70g caster sugar
pinch of salt
drop of yellow GEL food colouring
handful of poppy seeds

Pre-heat your oven to 140C/280F or Gas Mark 3.
Pulse together the ground almonds and icing sugar in a food processor, until very fine. If any big lumps remain, sift the mix through a sifter and set to one side.

Place egg whites, sugar and salt into a super clean bowl and whip with a whisk attachment on low speed (that’s 4 on my KitchenAid) for 3 minutes. It should look like foam by the end bubbly  and frothy.

Increase the speed on the mixer to medium-high (it’s about a 7 on my Kitchen Aid) for another three minutes. It should start looking like shaving foam. Finally increase the speed to high (which is an 8 on my KitchenAid) for another 3 minutes. It is going to really stiffen up and clumps into the whisk attachment.

Add in the gel food colouring and whip at the highest setting for another minute **Remember, by now if you have not reached a stiff meringue, dump the eggs  and start over with new egg whites and a washed clean bowl.**

Pop the dry ingredients into the meringue and using a rubber spatula gently fold the meringue in through the dry mix.

Use circular folding hand movements, bring in the meringue from the sides of the bowl through the powder mix and through the middle of the bowl. You will need a maximum of 25-30 folds. Stop after this, even it’s still a little lumpy.. it’s ok.

Fill up a piping bag with a couple of spoons on the batter and pipe circles onto parchment lined baking trays in small  discs with gaps of about 3-4 cm in between each.

Lift up the tray once piped and tap it against the counter tops twice, turn the sheet and give it another two good whacks. Sprinkle over a hand full of poppy seeds and pop the trays into your oven for about 12-14 minutes.

They’ll be done when the tops have crisped up and you can gently wiggle them from side to side on the parchment.

Once baked, pull them out and let the shells cool on their trays until cold. Gently remove and fill with your favourite fillings.


I filled mine with some LEMON CURD and swiss meringue buttercream I was practicing for a wedding but you could fill it with this BUTTERCREAM... and it'd be absolutely divine.


I was so impressed with the no wait version of the french macaron method this time around.

I have a super important wedding to bake for in two weeks and this recipe is going to be my life saver!!  Under 30 minutes and you have trays full of macaron... FOR REALS!! #macaronmonday is killing it this week.

Well if that doesn't bate Banagher...

Enjoy the week... I'll be keeping going with these edits. FOUR days and counting. Let's do this.

13 June 2016

Coffee and Cream Macaron


There was a time there before when all I wanted to make were macaron. The whole process of it... you know the sheer procrastibaking of it... and the fact they take ages to make and are gone in seconds by comparison is one of my favourite things.

But then the pesky Masters got in the way and my time for faffing about in the kitchen, as regulars here will know, was very much curtailed.

But I am happy to announce I am on the home straight folks! All my assignments are up, exam results are next week and I am on track with my thesis writing. It's looking good... So as a treat I decided to indulge in some macaron making! On a Monday no less... you know my penchant for Macaron Mondays!

I love coffee. Ever since the crash I feel like I have been on a diet of coffee and painkillers and as melodramatic as that sounds, I became very conscience of the amount of coffee I was consuming while being at home re-cooperating. So I decide to check myself for it...

And then just found other ways to sneak my vice into my day!! Ta-dah!

Coffee Macarons... made with a delicious amount of espresso powder for that devious, bitter caffeine kick and softened out by a smooth cool, creamy interior. These little morsels of mmmm... are perfect. I, in fact, shared them with a friend who commented 'these are the best macaron I have ever tasted'... he then proceeded to inquire as to whether or not I had actually made them.. but we will leave that one slide!

BEST. EVER. We'll focus on that!


Coffee and Cream Macaron 

aged egg whites (and by aged I mean crack the eggs, separate the whites form the yolks and leave them covered over in a bowl on your counter over night- up to 24 hours.)
100g caster sugar
150g ground almonds
280g icing sugar
2 tbsps espresso powder

Start with a clean, grease free mixing bowl and a mixer. I use the silver bowl and whisk off my stand mixer but, a hand mixer will do perfectly if that’s what you have!

On a high speed, whip your egg whites until soft peaks form. Continue whipping the egg whites on a high speed and start pouring the caster sugar into the mixing bowl. I start off with a slow and steady stream and stop after 1/3 has gone in. I let it whip for a while and start again, adding another 1/3 and then stopping, repeat pouring sugar. Repeat for the third batch. 

Continue whipping for a further 3-4 minutes until your egg whites form a thick and glossy stiff peaked meringue. 

Sieve together the icing sugar, ground almonds, and espresso powder into a large bowl and discard any large lumps or bumps you found were too big to go through the sieve. 

Taking a spatula, fold the egg whites into the almond, dry mixture. Your aim here is to squash out any air in the meringue. You can be rough with your folds, just make sure to keep folding through, making sure all the dry mix has been incorporated into the meringue.

You’re going for, what the internet describes as a “thick ribbon” consistency. Essentially that means the mix almost falls back on itself in around 10 seconds.


You can print off macaron templates... which are very helpful in giving you a good reference for size. I just use one I made myself as a guide... I cut heavy paper to fit the size of my tray and using a cookie cutter to help, just drew as many circles as I could on it to fill the whole page. Homemade. Cheap. Simple.

Line a few baking trays with parchment, and using your template, pipe circles onto the tray. I like to leave it a little from the edge, they fill the entire circle when you bang them out in the next step.

Holding your tray about a foot off above the counter top or table you are working it... drop it! Repeat this procedure a few times to pop any air bubbles left in your shells and allow the circles to settle. 

Leave the shells to rest so that they form a skin. look like the picture above and have become dry enough on the outside that you can lightly touch them.  This process could take up to an hour. (TIP: Leave them in a warm part of your house, like the windowsill where the sun is shining in.. they’ll be dry in no time!)

Preheat your oven to 130’. Once the macaron are ready for the oven,  pop them in for 10 minutes. After the 10 minutes, insert a wooden spoon into the oven door to keep it a little bit open. Continue baking for another 4-6 minutes until the top of the shell is crisp and if you wiggled it, gently, from side to side it should be one piece!

Remove from the oven onto a cooling tray and cool completely before filling. Continue baking whatever other shells are left in the same way. 


Cream Filling 
125g mascarpone cream cheese
125ml single whipping cream
65g icing sugar
1 to 2 tsp of vanilla extract

Take the mascarpone, cream and icing sugar and whip it up until you have a thick consistency. Add the vanilla to your taste and sandwich two shells, spooning it out using a teaspoon or piping bag filled with the cream filling. Serve.

Watch people melt as they collapse under the weight of your patisserie skills.

If you do have any left over, these will need to be stored in the fridge because of the dairy content but once you put them on the table.. they are not going to last.. Leftovers won't even be considered a real thing!


I really wish I had some left. That's the problem with baking and eating them all and then blogging afterwards... There's never enough.

Have a great week folks! Hope the summer is shaping up to all you want it to be and if you're popping by from colder parts.. hope Jack Frost isn't nipping too much at your nose!!

15 February 2016

Boston Cream Pie Macaron


Sweets for my sweet...

The plan was to have these ready for Valentine's Day but then we don't really celebrate it, so you see the urgency wasn't there. Understand, I love my husband dearly and like him almost every day of the week but we just don't do the whole gift giving, ceremonious proclamation of love on one specific day, every year. I much prefer that that to happen, on say a Tuesday, when it's been a rough day at school, the house looks like a dump, there's nothing on for dinner, my Masters isn't writing itself and he brings me tea and biscuits in my favourite mug.

Now that ladies and gentlemen, is way better than anything I might get on Valentines Day. It's the simple things right?

But then I had started making these and.. just kinda left them be. So I put them together this morning and went with something for Macaron Monday instead. Husband still got his sweets, they happened to be for after breakfast instead.

EEeeehhhh responsibility me should say... I don't necessarily recommend these as a breakfast, they are very heavy and very sweet but really, who am I to dictate your mornings choices? You follow that sugar laden yellow brick road if you want to. I'm just saying, some bran flakes might see you straight first!


BEFORE try to make these, make sure you have allotted yourself some time. For the cream pie filling I would recommend starting it the day before and just have it waiting for you in the fridge. The macaron take as much time as they need, they can't really be rushed. But giving yourself time here will ensure success, plus you can avoid doing anything in your real life because you're baking, and you have to concentrate.


The Cream Pie Filling

1 vanilla pod
100g sugar
500ml milk
4 egg yolks
45g cornflour
2 tbsp butter

Scrape the seeds out of the vanilla pod and put the pod, plus the seeds in a pot. Add 50g of sugar and milk and gently heat over a low-medium heat. but do not allow it to boil.
In a separate bowl whisk together the rest of the sugar, the eggs and the corn flour. When the milk is hot, but not boiling, remove it from the heat and pour 3/4 of it into the egg mix. Whisk it all together and transfer it back into the pot and back onto the heat. Allow the custard to cook, to become thick and bubbling for about 1 minute.

Remove from the heat and push through a sieve to remove any lumps, into a clean bowl. Stir in the butter and allow to cool before popping in the fridge for at least four hours, or even better over night.


The Vanilla Macaron

4 egg whites (keep the yolks for the filling)
100g caster sugar
150g ground almonds
280g icing sugar
1 tsp vanilla extract

Start with a clean, grease free mixing bowl and a mixer. (I use the silver bowl and whisk off my stand mixer but, a hand mixer will do perfectly if that’s what you have!)

On a high speed, whip your egg whites until soft peaks form. Add the vanilla. Continue whipping the egg whites on a high speed and start pouring the caster sugar into the mixing bowl. I start off with a slow and steady stream and stop after 1/3 has gone in. I let it whip for a while and start again, adding another 1/3 and then stopping pouring sugar. Repeat for the third batch. 

Continue whipping for a further 3-4 minutes until your egg whites form a thick and glossy stiff peaked meringue. 


Sieve together the icing sugar and ground almonds into a large bowl and discard any large lumps or bumps you found were too big to go through the sieve. 

Taking a spatula, fold the egg whites into the almond, dry mixture. Your aim here is to squash out any air in the meringue. You can be rough with your folds, just make sure to keep folding through, making sure all the dry mix has been incorporated into the meringue.

You’re going for, what the internet describes as, a “thick ribbon” consistency. Essentially that means the mix almost falls back on itself in around 10 seconds.


I use a silicone macaron mat to pipe my shells to size. You can print off macaron templates which are very helpful in giving you a good reference for size. Line a few baking trays with parchment, and using your template, pipe circles onto the tray. 

Holding your tray about a foot off above the counter top or table you are working it... drop it! Repeat this procedure a few times to pop any air bubbles left in your shells and allow the circles to settle. 

Leave the shells to rest so that they form a skin and have become dry enough on the outside that you can lightly touch them.  This process could take up to an hour. (TIP: Leave them in a warm part of your house, like the windowsill where the sun is shining in.. they’ll be dry in no time!)


Preheat your oven to 130C/260F or gas mark 2. Once the macarons are ready for the oven,  pop them in for 8 minutes. After the 8 minutes, insert a wooden spoon into the oven door to keep it a little bit open. Continue baking for another 4-6 minutes until the top of the shell is crisp and if you wiggled it, gently, from side to side it should be one piece!

Remove from the oven onto a cooling tray and cool completely before filling. Continue baking whatever other shells are left in the same way. 


The Chocolate Coat

100g dark chocolate (I used 60%)
100ml double, heavy cream

Put the heavy cream and the chocolate in a bowl and pop it in the microwave. You want to heat the cream enough so it will melt the chocolate, but not too hot that it boils in the bowl. I use a medium setting for a minute, then check and stir. Then pop it back in for another minute and stir again until it's completely melted and mixed together.

Set it to one side to cool. It will thicken as it cools. 


Putting it all together...

Match your macarons together so that they are in equal enough sized pairs. Using the top shell, gently dip it into the chocolate coating until it is evenly covered. Be very gentle and only apply a thin coat on the top. Pop into the fridge to firm up.
On the other half of the shell, pipe or spoon out as much filling as you like and once the chocolate coat on the other half of the shell has firmed pop it on.

These are messy as all hell... So I advise storing them in the fridge until you are about to serve/eat them.


Are you a Valentines kinda guy or gal? What did you do? Or are you like me and just act as if it's any other day and sneak some romance into the mundane days...


31 August 2015

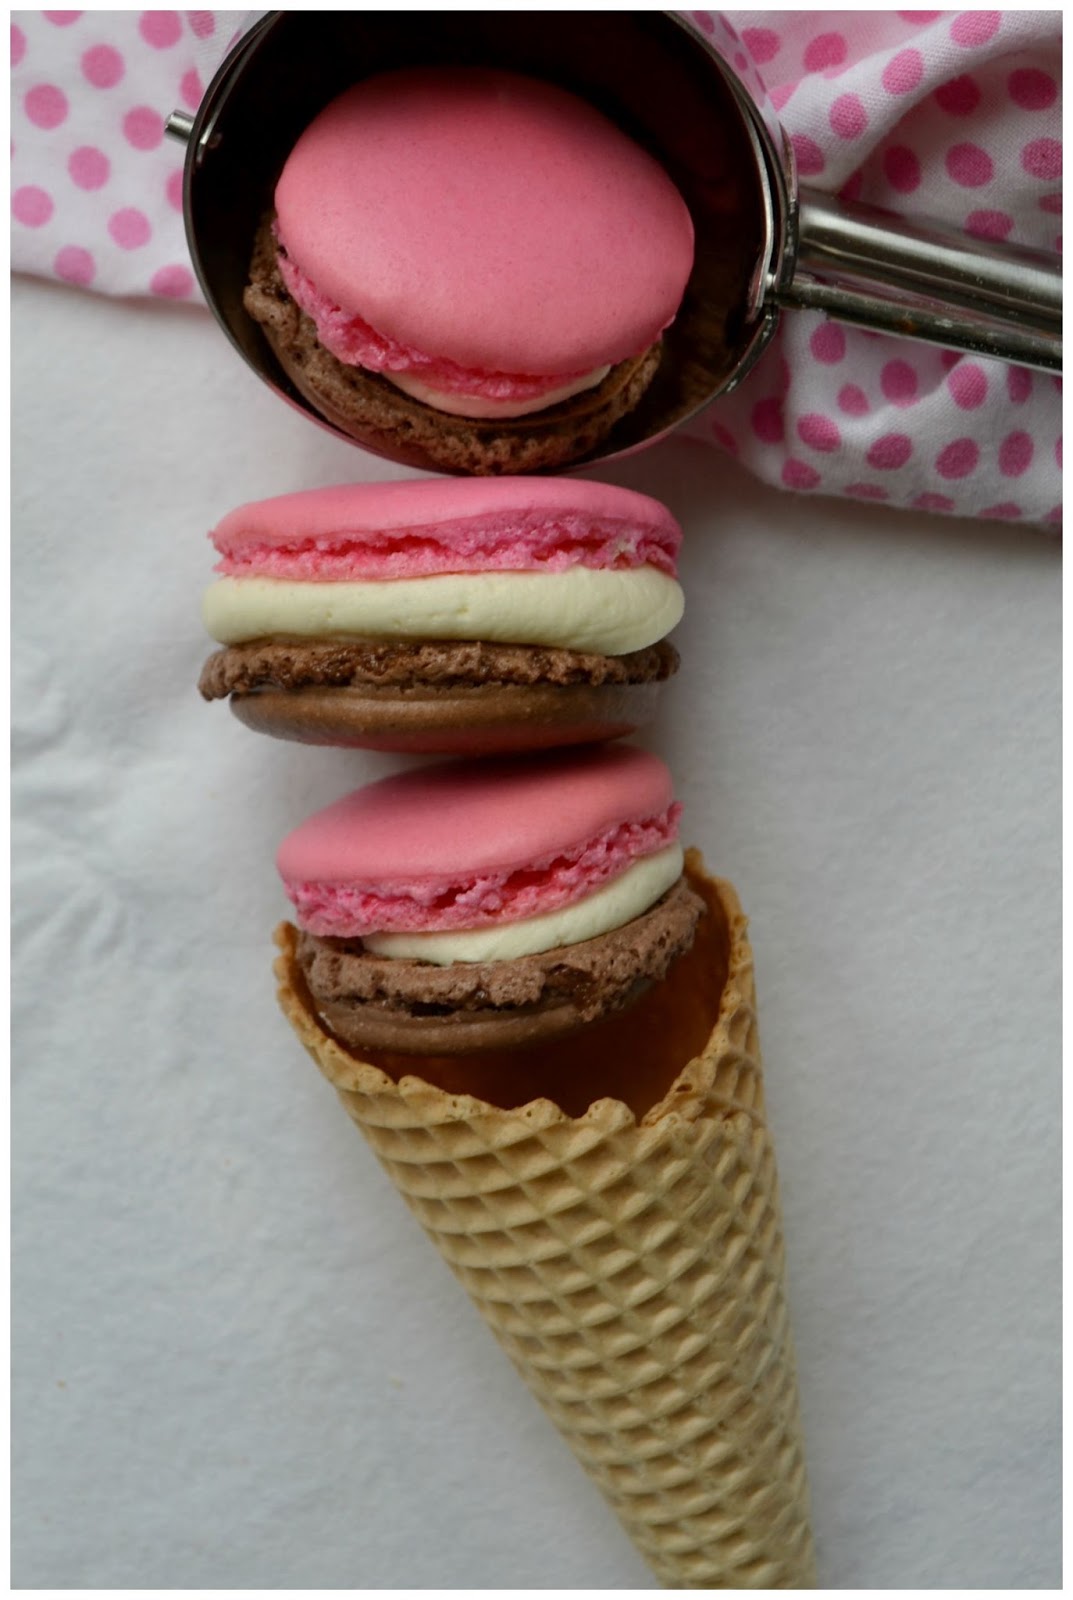
Neapolitan Macarons


It seems sad to say that September is upon us, the summer holidays are over and the kids are heading back to school. And we didn't really get a summer... the weather just never happened. 

One of my favourite  summer memories from home is having a treat after dinner. My Mom used to make us floats; a scoop of vanilla ice cream dumped into a glass of red lemonade. Old school fizzy lemonade, that had crazy amounts of sugar in it. And all manners of E numbers and colouring that are surely not allowed today. The kind that marked a big red ring around your lips. The ice cream fizzed up and this foamy top appeared. It became this tangy, sweet concoction and we loved it. It's one of those memories that, however simple it is in today's terms, is very special. 

Then there were those times when we went out for dinner. Desserts in restaurants were always so much more luxurious than those at home. Kids menus used to have trio's of ice cream, served in a tall glass with cream and cigarellos. I loved it when the waitress would ask you to choose your flavours after she listed them out. That to me was the epitome of swanky... I can choose more than just vanilla?? WOW!

I always chose neapolitan. 


I knew way back then that my sweet tooth was something I'd grow into and put to good use. I knew the restaurants that made their own ice cream, or brought in expensive ice cream as opposed to bog standard tub stuff. I liked to watch how ice cream melted against the wall of the glass. A good ice cream would leave a thick creamy smudge and not wipe of clean when you licked it. If I were lucky, there would be a ripple of chocolate fudge, or flecks of chips in the chocolate. It would be heaven.

As I've grown my tastes have clearly broadened. I still find neapolitan childishly decadent, and will indulge in it purely nostalgically but then.. given my penchant for baking (and procrastibaking) I can also make it into something, nay, anything else I want!!


Neapolitan Macarons

4 aged egg whites (Leave them covered over in a bowl on your counter over night- up to 24 hours.)
100g caster sugar
150g ground almonds
280g icing sugar
1/4 teaspoon strawberry essence
squirt pink food gel, or splash of pink food colouring
2 tbsp coco powder

Start with a clean, grease free mixing bowl and an electric mixer. 

On a high speed, whip your egg whites until soft peaks form. Continue whipping the egg whites on a high speed and start pouring the caster sugar into the mixing bowl. I start off with a slow and steady stream and stop after 1/3 has gone in. I let it whip for a while and start again, adding another 1/3 and then stopping pouring sugar. Repeat for the third batch. 

Continue whipping for a further 3-4 minutes until your egg whites form a thick and glossy stiff peaked meringue. 


Sieve together the icing sugar and ground almonds into a large bowl and discard any large lumps or bumps you found were too big to go through the sieve. 

Taking a spatula, fold the egg whites into the almond, dry mixture. Just a couple of folds at first. You need to them split your mixture in half. To half the mixture add the coco powder and to the other add the strawberry essence and pink food colouring.

Fold both your mixtures separately until fully combined. Remember: your aim now is to squash out any air in the meringue. You can be rough with your folds, just make sure to keep folding through, making sure all the dry mix has been incorporated into the meringue. Continue to the  “thick ribbon” consistency. Essentially that means the mix almost falls back on itself in around 10 seconds.

Line a few baking trays with parchment, and using your template, pipe circles onto the tray. I use a silicone macarons mat as a guide, under my parchment paper to pipe my macarons shells to size.

Holding your tray about a foot off above the counter top or table you are working at... drop it! Repeat this procedure a few times to pop any air bubbles left in your shells and allow the circles to settle. 

Now leave the shells to rest so that they form a skin and have become dry enough on the outside that you can lightly touch them.  This process could take up to an hour. (TIP: Leave them in a warm part of your house, like the windowsill where the sun is shining in.. they’ll be dry in no time!)


Preheat your oven to 130’. Once the macarons are ready for the oven,  pop them in for 8 minutes. After the 8 minutes, insert a wooden spoon into the oven door to keep it a little bit open. Continue baking for another 4-6 minutes until the top of the shell is crisp and if you wiggled it, gently, from side to side it should be one piece!

Remove from the oven onto a cooling tray and cool completely before filling. Continue baking whatever other shells are left in the same way. 


I filled these little confection perfections with my badass buttercream. That became the middle vanilla filling of the 'ice cream'. None of the flavours over power each other. They just come together in bite size morsels of mmmm...

You could of course, fill it with actual vanilla ice cream. But then.. lazy here went with frosting.


Link up your recipe of the week
 
Copyright © Procrastibake | Theme by Neat Design Corner |