28 March 2016

Carrot and Walnut Loaf


Sometimes it's the simple things, right? The things that keep you going. The things that make you step back and take a breath and just be. I needed this bake as much as I needed a break, a breather, a catch up this weekend. 

One word. Chocolate.

The chocolate was everywhere. It still is everywhere. Now don't get me wrong, I am a massive fan of chocolate but... Ugh... The kids get so many Easter eggs, you can't get away from them. 

So this loaf came out of some sort of sugar coma guilt complex.

It's an easy one-bowl-great-for-breakfast-loaf. It's filled with brown flour, ground almonds and walnuts. Packed with orange, juicy carrots, a hint of spice and a little bit of brown sugar. It's probably the healthiest thing I bake and it's soooo good.

I love it toasted, smooshed with some real butter and a hot coffee. It's the simplest thing in the world to make. You can't mess this up and it's a real deal cake for breakfast notion. 


Carrot and Walnut Loaf
50g self-raising flour
250g brown flour
75g ground almonds
1tsp baking powder
2 tsp cinnamon
150g soft brown sugar
250ml vegetable oil
100ml buttermilk
4 large free range eggs
2 medium sized, grated carrots
100g chopped walnuts

Preheat the oven to 180C, 350F or Gas 4. Line a loaf tin with some parchment.
In a medium bowl, sift together the flours, cinnamon, and baking powder and then add the sugar. Stir in the almonds. Add the oil and eggs, mix until blended, then stir in the carrots and nuts. Pour the mix into your prepared tins.

Bake for 35 to 40 minutes in your preheated oven. Check for done-ness before removing from the oven, a skewer inserted into the cake should come out clean. Allow the loaf to cool in the tin before removing it. 


It doesn't make me feel bad about eating it and it's definitely not chocolate. This cake is super moist, packed with good flavour! Try it toasted, you won't regret it!

A treat I think the Easter bunny would approve of I think!

21 March 2016

Chocolate Brownie Cheesecake


There was no competition this month.

Before I had even read the recipe I knew that this was my choice with the Cake Slice Bakers. It had all the promise of being something spectacular... Brownies, Baked Cheesecake.. am HELLO! Where have you been all my life? I read the description, Maida Heatter always provides some little description of the cake, and chuckled.

"It is fascinating to eat both cheesecake and Brownies in the same bite. And it is gorgeous." 

Such sweet simplicity right. What could go wrong?

I remembered that the book was first published back in 1982 (I have the 2011 reprint) and while I am thoroughly enjoying baking through the book, I think it can feel a tad outdated sometimes. Methods have evolved and so too has kitchen equipment. The recipe for this cake I found to be convoluted and yielded very mixed opinions.

There was no doubt that it was tasty. But for me, the laborious nature of the recipe made it lacklustre. The brownie recipe turned out way to dry. That's not a brownie as I understand it. There was no chewy, gooeyness. Just a dry, softness. But they stayed firm and held together during the bake.

The cheesecake was gloriously creamy. I don't own an 8 inch spring form (What the actual?? I know right?) so used a 9 inch and it made a huge difference. The cake didn't puff up like I am used to in a baked cheesecake- but that one is on me. The mix itself contains A LOT of sugar. The top of the cheesecake coated itself in this rather delicious crisp sugar shell, almost creme brulee like. Not a bad thing per say, just not expected.

I have adapted the recipe below to make it more convenient, an updated version for you to try. The flavours all meld together to make it a very worthy bake, but there is no need for it to be so tedious. I am going to help you cut down on all of that "hard work"!!


Chocolate Brownies
adapted from Maida Heatter's Cakes, pg 152.

180g self raising flour
3 tbsps coco powder
125g butter
60g dark chocolate
1tsp instant coffee (powder or granular)
1/2 tsp vanilla
200g sugar
2 large eggs

Preheat the oven to 180 C, 350 F or Gas Mark 4.
Line and 8 inch square pan with tin foil, shiny side up. Spray with some cake release spray or brush over with some melted butter.
Sift the flour and the coco powder together.
In a sauce pan, over a low heat, put the chocolate and butter. Stir occasionally until melted.
Stir in the coffee and vanilla. Add the sugar and stir thoroughly. Add the eggs one at a time mixing well after each addition until incorporated.
Finally fold in the flour and coco mixture.
Pop the mixture into the prepared tin and then into the oven for about 20 minutes. Just check with a skewer in the middle, if it comes out clean, you are good to go.
Remove the pan from the oven and allow to cool on a cooling rack.
Once cool, flip the brownies out and wrap them in cling film. Pop them straight into the freezer to go cold and to make them easier to chop up into little bits.

Once you have chopped them up, keep them cold in the fridge.

You will have a lot of brownies.. cut them up any size you want. I went with chunky for this cheesecake and we used the rest in ice cream. And we just ate them out of that bowl, as we passed them on the counter. And because they are so small, you just keep popping them your mouth.

Uuuuggghh... Bite size brownies are the worst.


Cheesecake Base

300g digestive biscuits
100g butter

Preheat your oven to 180 C, 350 F or Gas Mark 4.
Smash the the biscuits into smithereens whatever way you know how. I use the therapeutic Ziploc bag and rolling pin method.
Melt the butter.
Add the butter to the biscuits and mix until all together.
Press gently into a spring form pan, ideally an 8 inch round and bake in a preheated oven for 5 minutes. Keep the oven on.

Remove the pan and allow to cool. Boil the kettle.

Baked Cheesecake

450g cream cheese (ideally Philadelphia but really the best you can afford)
1 tsp vanilla
275g sugar
4 eggs

In a large bowl, beat the cream cheese until smooth. Add the vanilla and then the sugar. Beat again until smooth.
Add the eggs one at a time, just until the yolk has disappeared.
Add the wet mix in on top of your biscuit base.
From the fridge plop in your bite size brownie chunks and give it a quick swirl if you want to.
Put the spring form tin into a oven proof pan with a high ridge. Pour the just boiled kettle water around the spring form pan, up as far as your supporting pan will allow, and bake the cheesecake in the oven for about 1 hour.

After an hour, turn off the oven and prop the door open with a wooden spoon. Allow the cheesecake to fully cool in the oven.

You could then pop it in the fridge. It'd make cutting portions easier but the creaminess is more apparent at room temperature.


I figured the cheesecake would spill up over the brownies and almost encase them, but alas the 9 inch pan was just that little too big for this mix to do that. Not a big deal. But you know yerself now, aesthetically it would have been nicer I think.


Like I said, there is no argument. What I baked was tasty. The brownies added that chocolate flavour layer and broke through the cool, creamy vanilla of the cheesecake. The biscuit crumb cut through all the sweet, providing that hint of crunch. It was a great idea bake, just not what I was hoping it would be like.

Go see what the other bakers whipped up this month... I know there are a few more cheesecakes to behold! I wonder how they fared out?


17 March 2016

Green Velvet Cupcakes for St. Patrick's Day


In case you ever reach the end of  rainbow and meet the elusive Leprechaun guarding his pot of gold, remember I once told you this. Dropping some Irish folklore knowledge bombs on you, so listen up.

Leprechauns are little scheming, tricksters. They don't want to give you their gold. And when you get to the end of the rainbow, the innocent looking little shoe menders will be none too pleased you are there. If you can catch him, he has to grant you three wishes. But instead of capture, he might offer you one of two options; his pot of gold or one silver coin in a drawstring purse.

Looking at that gleaming, big ol' pot of gold sparkling at the end of the rainbow you might be tempted to scoff at the drawstring purse, but consider yourself warned.

The correct option is the purse.

A Leprechaun is full of mischief so keep your eyes on him. As soon as you have chosen the gold, he will disappear over the rainbow and the pot will turn to dust. Leaving you empty handed...

The one silver coin in the drawstring purse is what you need to be choosing. The purse itself, is self replenishing. As soon as you take the silver coin out, another magically appears. That's the gold you're looking for. And if you are lucky enough to get hold of such a magical item, use it wisely. Like buying all your friends something nice... and me a bakery (seeing I was the one who told you about it in the first place!!).

Until then though, keep chasing the rainbows. It's the only way you're going to catch up with the little scamp in the first place.


Green Velvet Cupcakes (Makes 12)

125g salted butter
225g caster sugar
275g self raising flour
1 tablespoon coco powder
2 large eggs
200ml buttermilk
1 teaspoon white vinegar
1 teaspoon baking powder
couple drops of green food colouring- depending how dark you want them.

Cream your butter and sugar until light and fluffy and pale, I usually leave my mixer on for about 5 minutes. 
Add in an egg, one at a time until the yolk has been disappeared.
Dry whisk or sieve your flour and coco powder together.
Add the vinegar to the baking powder and make a paste, then add this to the egg/sugar/butter combination. Fold in.
Add half your dry ingredients to the butter/sugar/egg/vanilla mix and then half the buttermilk. Mix until combined and repeat. Add the food colouring.

Be careful not to over mix the batter here as you want them to stay light and fluffy. The buttermilk helps with that too. Just make sure all the ingredients have been mixed together.

Fill your cases to two thirds full and bake in your oven at 350/180 or Gas mark 4.
Bake for 18-20  minutes. You'll know when they are done as the tops are a little crisp, have a slight spring in them when you gently push down on the top or a skewer inserted in the middle comes out clear!

You will find the vanilla buttercream recipe HERE.


Buttermilk Pancakes
American style (as in not thin and crepe like)

This recipe makes about 12 medium pancakes. I used it to make 24 little ones and still had some left over for breakfast!


225g plain flour
1 tablespoons baking powder (you could just use self raising flour/all purpose here if you didn't have plain or baking powder)
1 teaspoon sugar
30g melted salted butter
300ml buttermilk
2 large eggs

Green food colouring as above...

I dump all the ingredients in the bowl, melt the butter in the microwave and pour that in. I mix with an electric hand mixer until all the ingredients have been combined. Pour it out into a jug and let it sit in the fridge for about 20-30 minutes before cooking.

I use real butter to fry up little tiny pancakes, transfer them to a plate, pat them dry with a bit of paper towel and let them cool completely before putting them on a cupcake (otherwise it'll melt the buttercream!). 

I then just drizzle maple syrup over the top of the pancake and let it run down the side of the cupcake. 


Happy St. Patrick's Day to all my family friends and to you my lovelies! 

Thank you as always, for stopping by and gracing this little corner with your presence. I hope that whatever part of the world you are in, it's green and happy and that the luck of the Irish spreads your way...


25 February 2016

Birthday Cake


My brother and I were born on the exact same date, 7 years apart. So a little bit like twins, we share a birthday. Every year. We have to share. And it's a good thing I am OK with sharing too because I love celebrating birthdays. With cake and tea parties and the like. 

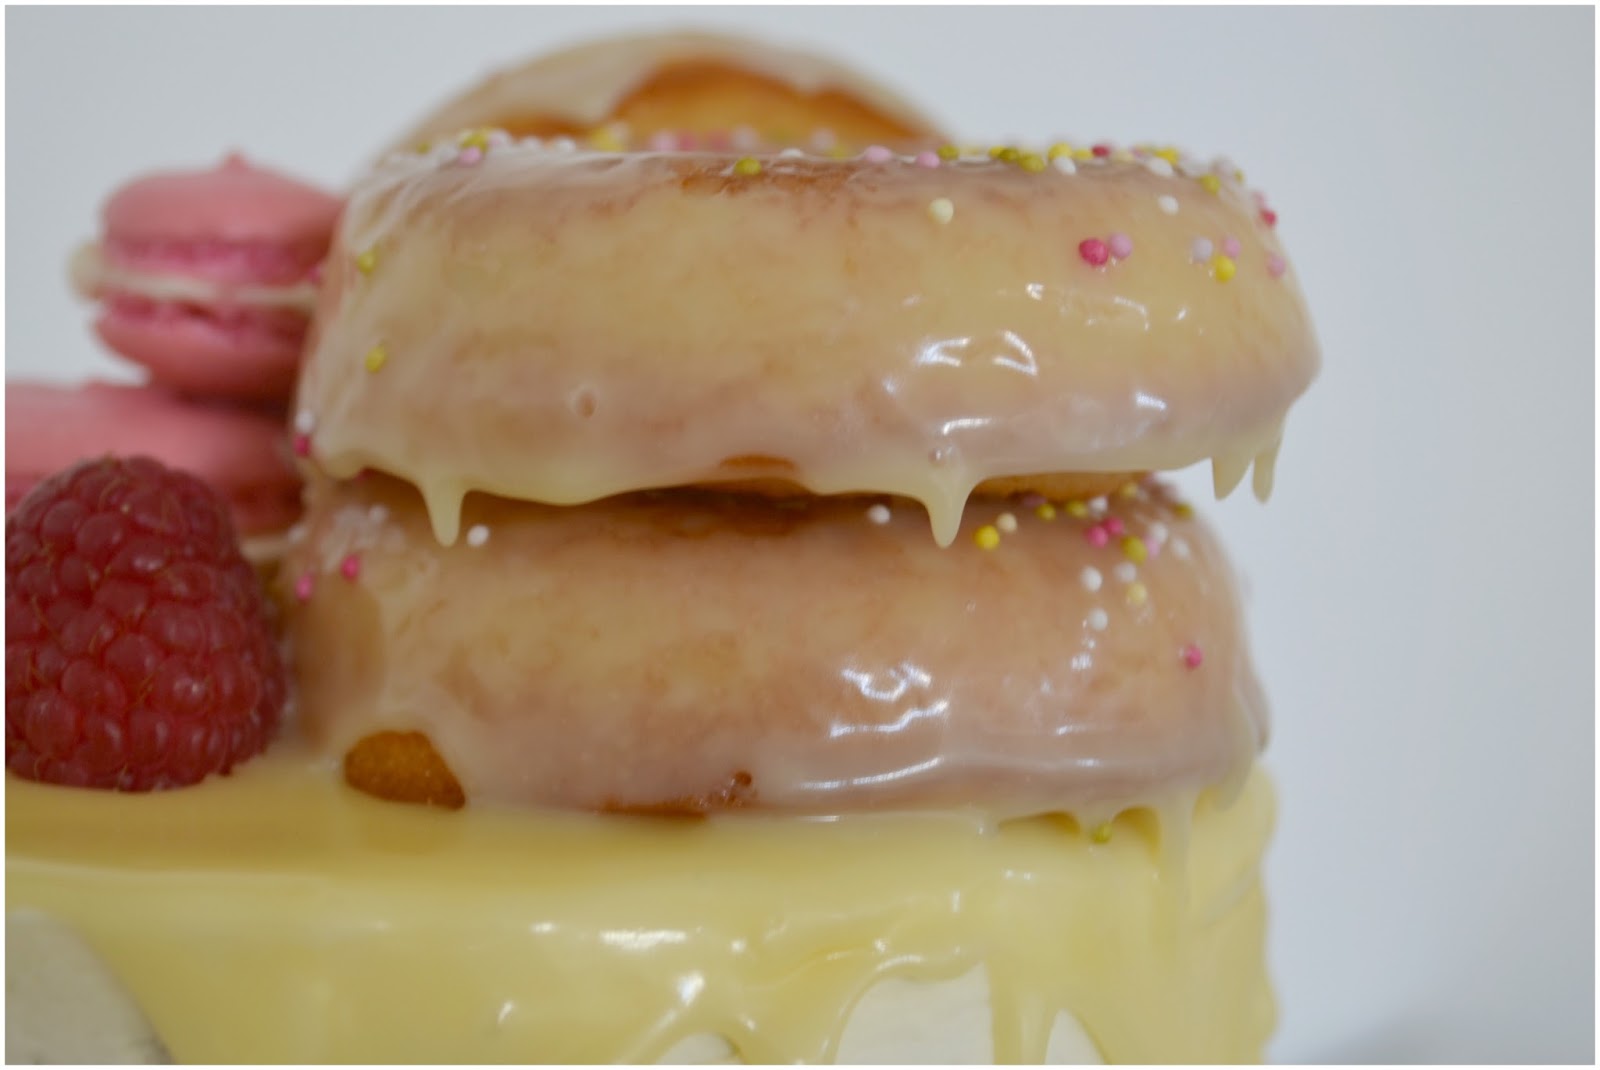
My brother... he has a very special birthday this year. His 40th and that required a very special cake. But he's a guy with simple tastes. He likes buttercream and he likes raspberry jam. It's not much to go with really.. but I did what I could and this is what I came up. 

It was sort of my birthday cake too. So I guess the fussy outside speaks of me while the flavour combination speaks of my brother. See, that's me sharing. 

Again. 


It's not actually that elaborate. Basically it's a dressed up vanilla and jam sponge. And considering you could buy most of the toppings ready made, it's really fools play. I however made all the decoration from scratch, but that's how I roll.  If you are any way decent at putting two layers of cake one on top of the other, sandwiched with buttercream and jam... then you will be able to do this.

It's not that difficult to do.


White Chocolate and Raspberry Birthday Cake

The Cake- Makes two 6 inch, deep pan cakes- for anything bigger i.e. 8 inch pans,  I suggest doubling  the recipe.

125g salted butter
225g caster sugar
275g self raising flour
3 large eggs 
125ml buttermilk
1 tsp baking powder
1 tsp of vanilla extract

Line two 6 inch cake tins with parchment and leave to one side. Preheat your oven to 350F, 180C or Gas mark 4. 

In a bowl cream your butter and sugar until light and fluffy and pale.
Add in an egg, one at a time until the yolk has disappeared. Then add the next, scraping down the sides of your bowl.  
Dry whisk or sieve your flour and baking powder together.
Add the vanilla to the egg/sugar/butter combination.
Add half your dry ingredients to the butter/sugar/egg/vanilla mix and then half the buttermilk. Mix until combined and repeat. Be careful not to over mix the batter here as you want the layers to stay light and fluffy. The buttermilk helps with that too. Just make sure all the ingredients have been mixed together.
Fill your cake tins to about half full, each, and bake in a preheated oven on the middle shelf.
Bake for 20 to 25 minutes. You'll know when they are done as the tops are golden, have a slight spring when you gently push down on the top or a skewer inserted in the middle comes out clear. Allow to cool in the tins for about 10 minutes, then turn out onto a wire tray and allow to cool fully before filling with jam and cream. 


The White Chocolate Dripping

100ml of double cream
200g white chocolate

Break up the white chocolate and pop it into a heat resistant bowl. Heat the double cream in a small pot until just before boiling, pour over the white chocolate. Cover the bowl over with a plate and allow a few minutes for the chocolate to melt.

Stir until the chocolate and cream are fully mixed and set aside to thicken.


The White Chocolate Buttercream 

225g soft, room temperature, unsalted butter
500g sifted icing sugar
up to 60ml of the white chocolate ganche you made for the dripping.. about 4 good tablespoons

Using an electric mixer, beat the butter on high until it is very soft and pale. (TIP: pop the butter in the microwave for a few seconds until very soft.)
Add in the icing sugar a few teacups at a time.
Add a tablespoon of the ganache in until the desired texture has been reached, you might not need all of it. 
Mix the holy moly out of it until light and fluffy. The faster and longer you mix this, the lighter and fluffier it will be.


Putting it all together...


Once the cake is cool add the first layer, top side down. The underneath part is flattest. Fill with a layer of buttercream and your jam filling. Here, I picked a raspberry conserve. Add the next cake layer, again top side down. Fill in any gaps and smooth out your buttercream. Pop the cake in the fridge for a few moments, to harden the buttercream and make the cake more stable to work with.

Remove the cake from the fridge and add the buttercream to the top and sides and smooth out. I have left this semi-naked because a) I'm a tad lazy and b) that's how I like cakes to look. Using a teaspoon, spoon the chocolate right at the edge of the cake to create the drips, then fill in the middle for the top coating. Add your decorations....


  • For the donuts you need look no further than HERE and the macarons look HERE... But look, honestly those can also be bought in supermarkets so if you are new to baking, pick your battles. Make the cake from scratch, buy the decorations. 


Honestly no need to be killing yourself. NO ONE is going to judge you if you roll up a  party with a cake looking like this.. and if they do! PPPffftttt... Turn your back and walk away. You got no time for that! You don't need that kind of negativity in your life. And those folk don't deserve your cake.


21 February 2016

Kansas City Chocolate Dream


One bowl wonders are a favourite of mine. One bowl and a pot I can handle, anything more than that and you are looking at me needing to prep myself to bake. I love intricate bakes don't get me wrong, but when something pops up that's a one bowl, dump cake of sorts with a self frosting component- OH hells to the yes!!

The Kansas City Chocolate Dream is my next installment from The Cake Slice Bakers. Time wasn't an issue for me this month, but being lazy was. I know, I know but don't judge me... I was still actively productive!!  Really though when I whittled down the options, having all the ingredients in the pantry and only needing one bowl and one pot, the other bakes couldn't hold a candle.

In saying all of that, this cake weirded me out, a lot. I followed the recipe exactly, no shortcuts or skip overs. It's a very sticky mix, not much give. The chocolate hot sauce topping is strange and the whole concept of something genuinely self frosting just went against all my bakers instincts, and I was right. It did what Maida Heatters Cakes said it would do, it fluffed up, more than doubled in height and the frosting turned this kind of black patent topping. But it tasted... I don't know really. Over done isn't right, but not burnt. There was still a good chocolate flavour from it, but just over done. You know?

It just didn't add anything to the cake for me.


Kansas City Chocolate Dream

The Cake
130g flour
2 tsps of baking powder
2 tbsp of cocoa powder
130g granulated sugar
225ml milk
1tsp vanilla
60g butter (melted)
60g walnuts, chopped roughly

Preheat your oven to 350F/180C or Gas mark 4. Butter an 8 inch square baking pan and leave to one side.
In one bowl dry whisk the first 4 ingredients. Add the milk and vanilla, then the melted butter and mix until fully incorporated. Fold through the walnuts. Add the contents of the bowl to the square pan and leave to one side.


The Topping
75g granulated sugar
6tbsp cocoa powder
85g soft brown sugar
2tsp instant coffee
250ml water

In a small saucepan, combine all the ingredients and stir over a high heat until boiling and all the sugar has dissolved.  Gently ladle the hot chocolate mix over the top of the cake in the pan and pop in the oven for 40 minutes. The topping sinks to the bottom of the pan when baking...

When it's finished, allow it to cool completely before inverting onto a serving plate. The cake might get a little stuck in the tin, so give it a good tap to come out. Also, the goo topping might be all stuck in the inside of your pan. A spatula will help un-stick that and you can just spread it right back on the top of your cake.


The cake crumb itself was fabulous. Light and fluffy and a total contrast to the weird, self frosting shenanigans. I would personally have omitted the walnuts in the mix, they were just unnecessary. Imagine if you will, soft almost brownies with a peculiar chocolate goo oozing from the top. That is this cake. Serves me right for being lazy.

Kansas City has some questions to answer though, if this is their idea of a chocolate dream!


Served with ice cream people proclaimed this wasn't that bad. It didn't have the coffee bang off of it that I expected, but it was eaten and some people actually liked it. Not one I will rush back to.

It was a strange one alright.


15 February 2016

Boston Cream Pie Macaron


Sweets for my sweet...

The plan was to have these ready for Valentine's Day but then we don't really celebrate it, so you see the urgency wasn't there. Understand, I love my husband dearly and like him almost every day of the week but we just don't do the whole gift giving, ceremonious proclamation of love on one specific day, every year. I much prefer that that to happen, on say a Tuesday, when it's been a rough day at school, the house looks like a dump, there's nothing on for dinner, my Masters isn't writing itself and he brings me tea and biscuits in my favourite mug.

Now that ladies and gentlemen, is way better than anything I might get on Valentines Day. It's the simple things right?

But then I had started making these and.. just kinda left them be. So I put them together this morning and went with something for Macaron Monday instead. Husband still got his sweets, they happened to be for after breakfast instead.

EEeeehhhh responsibility me should say... I don't necessarily recommend these as a breakfast, they are very heavy and very sweet but really, who am I to dictate your mornings choices? You follow that sugar laden yellow brick road if you want to. I'm just saying, some bran flakes might see you straight first!


BEFORE try to make these, make sure you have allotted yourself some time. For the cream pie filling I would recommend starting it the day before and just have it waiting for you in the fridge. The macaron take as much time as they need, they can't really be rushed. But giving yourself time here will ensure success, plus you can avoid doing anything in your real life because you're baking, and you have to concentrate.


The Cream Pie Filling

1 vanilla pod
100g sugar
500ml milk
4 egg yolks
45g cornflour
2 tbsp butter

Scrape the seeds out of the vanilla pod and put the pod, plus the seeds in a pot. Add 50g of sugar and milk and gently heat over a low-medium heat. but do not allow it to boil.
In a separate bowl whisk together the rest of the sugar, the eggs and the corn flour. When the milk is hot, but not boiling, remove it from the heat and pour 3/4 of it into the egg mix. Whisk it all together and transfer it back into the pot and back onto the heat. Allow the custard to cook, to become thick and bubbling for about 1 minute.

Remove from the heat and push through a sieve to remove any lumps, into a clean bowl. Stir in the butter and allow to cool before popping in the fridge for at least four hours, or even better over night.


The Vanilla Macaron

4 egg whites (keep the yolks for the filling)
100g caster sugar
150g ground almonds
280g icing sugar
1 tsp vanilla extract

Start with a clean, grease free mixing bowl and a mixer. (I use the silver bowl and whisk off my stand mixer but, a hand mixer will do perfectly if that’s what you have!)

On a high speed, whip your egg whites until soft peaks form. Add the vanilla. Continue whipping the egg whites on a high speed and start pouring the caster sugar into the mixing bowl. I start off with a slow and steady stream and stop after 1/3 has gone in. I let it whip for a while and start again, adding another 1/3 and then stopping pouring sugar. Repeat for the third batch. 

Continue whipping for a further 3-4 minutes until your egg whites form a thick and glossy stiff peaked meringue. 


Sieve together the icing sugar and ground almonds into a large bowl and discard any large lumps or bumps you found were too big to go through the sieve. 

Taking a spatula, fold the egg whites into the almond, dry mixture. Your aim here is to squash out any air in the meringue. You can be rough with your folds, just make sure to keep folding through, making sure all the dry mix has been incorporated into the meringue.

You’re going for, what the internet describes as, a “thick ribbon” consistency. Essentially that means the mix almost falls back on itself in around 10 seconds.


I use a silicone macaron mat to pipe my shells to size. You can print off macaron templates which are very helpful in giving you a good reference for size. Line a few baking trays with parchment, and using your template, pipe circles onto the tray. 

Holding your tray about a foot off above the counter top or table you are working it... drop it! Repeat this procedure a few times to pop any air bubbles left in your shells and allow the circles to settle. 

Leave the shells to rest so that they form a skin and have become dry enough on the outside that you can lightly touch them.  This process could take up to an hour. (TIP: Leave them in a warm part of your house, like the windowsill where the sun is shining in.. they’ll be dry in no time!)


Preheat your oven to 130C/260F or gas mark 2. Once the macarons are ready for the oven,  pop them in for 8 minutes. After the 8 minutes, insert a wooden spoon into the oven door to keep it a little bit open. Continue baking for another 4-6 minutes until the top of the shell is crisp and if you wiggled it, gently, from side to side it should be one piece!

Remove from the oven onto a cooling tray and cool completely before filling. Continue baking whatever other shells are left in the same way. 


The Chocolate Coat

100g dark chocolate (I used 60%)
100ml double, heavy cream

Put the heavy cream and the chocolate in a bowl and pop it in the microwave. You want to heat the cream enough so it will melt the chocolate, but not too hot that it boils in the bowl. I use a medium setting for a minute, then check and stir. Then pop it back in for another minute and stir again until it's completely melted and mixed together.

Set it to one side to cool. It will thicken as it cools. 


Putting it all together...

Match your macarons together so that they are in equal enough sized pairs. Using the top shell, gently dip it into the chocolate coating until it is evenly covered. Be very gentle and only apply a thin coat on the top. Pop into the fridge to firm up.
On the other half of the shell, pipe or spoon out as much filling as you like and once the chocolate coat on the other half of the shell has firmed pop it on.

These are messy as all hell... So I advise storing them in the fridge until you are about to serve/eat them.


Are you a Valentines kinda guy or gal? What did you do? Or are you like me and just act as if it's any other day and sneak some romance into the mundane days...


Copyright © Procrastibake | Theme by Neat Design Corner |