10 September 2015

Apple and Blackberry Frangipane


Summer is definitely over. Last I checked I was dusting summer berries with icing sugar, drinking ice cool lemonades on the porch and doing all manners of warm weather things... Aaaahhhh...

No wait, wait..

That was my imaginary summer. Because unlike the rest of the world it seems, Ireland has one long season that flitters between cold and rain, warm and rain... Oh! And breezy/windy/gale-y. In Ireland we have become very adept at mimicking summer behaviours, in our temperamental temperate climate. (stupid climate.. grumble grumble!!) But now that the months have changed to Autumn, the weather has become seasonally appropriate. The cool air feels right for this time of year, the days are shorter and the Autumn fruits are plentiful. 

This week on The Great British Bake Off, the bakers had to tackle pastry. Frangipane is one of those wonderfully versatile bakes, easy to whip together and customize to your liking. Here- I decided to get fruity, using my two favourites from this weeks garden harvest, Apples and Blackberries.

I had notions of cosy evenings by a roaring log fire, curled up with a good book, strong cup of tea and a warm slice of frangipane. Still in my head of course... But perfectly reasonable and perfectly seasonal.


All Butter Short Crust


240g plain flour
50g icing sugar
150g diced cold butter (+ a little extra for greasing)
1 large egg


Preheat your oven to 180C/350F or Gas Mark 4.
Put the flour, butter and icing sugar into a food processor and blitz until looks like breadcrumbs.
Crack in the egg and bring together until a soft ball forms.
Wrap in clingfilm, pat down and leave in fridge for 30 mins.
Grease up a 8 inch round loose bottom pie tin with butter.
after 30 minutes in the fridge, take it out and roll it out thin, to fit your tin. 


Blind bake your pastry case bottom, using pastry beads for about 15 minutes. remove from the oven and allow to cool slightly. Make the filling, while you are blind baking your pastry.


Almond Cream Filling

150g softened butter
150g caster sugar
150g ground almonds
50g self raising flour
3 large eggs
125g blackberries

Cream together the butter and the sugar.
Dry mix the almonds and the self raising flour and add to the mix.
Add the eggs and mix thoroughly until all of the ingredients have been combined.
Fold in the blackberries.
Set the bowl to one side.

Once the pastry has cooled, tip the filling into the pastry case and smooth out the top.


Apple Topping

350-400g apples of your choice (about 4 medium apples)
90ml (about 6 tablespoons) honey

Peel and core the apples and then as evenly as possible, slice them thinly so that you can arrange them neatly in on top of your Almond Cream Filling. Drizzle over the honey.

I went with the obvious choice, rose pattern below. It works out nice and bakes well. Feel free to choose whatever pattern you like. Or just dump the apples on. There are no hard and fast rules 'round here!


Bake the frangipane at 180C, 350F or Gas Mark 4 for 40-50 minutes until the top is browning.
It will look like it's almost about to burn when it's done.
The center will be soft and moist and the apples will be juicy.


Be sure to swing by the other GBBO Bloggers bakes when you pop over to the lovely Stacey's Blog, who happens to be our host for this week. She, along with Jenny and all the other bloggers have been baking their socks off!



06 September 2015

My Dolly's Birthday Cake


Every day she amazes me. Every day is new and an adventure.

I look and I wonder the way her mind works...

How caring, thoughtful and easy going she is. How artistic, creative and imaginative she is. How she never stops asking questions, is constantly wondering and knows how to day dream with the best of us. How she can switch from being Momma's favourite girl to the teenager I would sell to the lowest bidder in a matter of seconds. How even though she's changing, growing up and becoming this amazing young adult.. she's still nothing but that little bundle of new baby I held in my arms 14 years ago.

She's still that tiny little Doll I get to call my very own. And every year since the dawn of her verbalisation of the words chocolate and cake... it's been the same request.

Chocolate cake with all the fudge trimmings.

Every year the cakes get more elaborate. Every year this girl pushes my skills.. Every year without fail.

Below is this years offerings... (note; there are no "inside this cake" pictures.. teenage girls are hungry ones!!)


Chocolate Cake


100g of good plain chocolate (TIP: Try at least 70% coco if you can handle that depth) 
225g of caster sugar
100g coco powder
300g self raising flour
1 teaspoon salt
1 teaspoons baking powder
2 eggs
50ml hot and strong coffee
125ml of vegetable oil
125ml of buttermilk
1 teaspoons vanilla

Preheat your oven to 180C/350F/Gas Mark 4
Line two 8 inch cake pans with parchment. (I used my Wilton 6 inch pans for this cake- same recipe was used)
Melt the chocolate into the coffee and when melted add the vanilla.
Cream the sugar and the eggs until light and fluffy.
Dry mix all your dry ingredients together and slowly add them to the sugar/egg combination.
Add the buttermilk and mix.
Add the oil and mix.

Finally fold in the coffee/chocolate combination.
Pour between your prepared pans and bake for 35-30 minutes until the top has a spring in it and a skewer inserted into the middle comes out clear.
Allow to cool in the pans for about ten minutes, then remove and allow to cool completely on a wire rack. 

I decorated the cake top with some "Tiffany Blue" Macarons, adapted from this recipe and filled it with my chocolate ganache recipe and my basic buttercream, coloured Tiffany blue also. 


04 September 2015

Almond Cake with a Fig Jam and Mascarpone Topping (Gluten Free)


Husband said do not post that picture with the words.. It's lame. But then who is he to judge, he's lame. I am lame. We are all lame in our own way and I am posting the picture. Because it makes me laugh. 

I make the funniest of jokes.. not that they are that funny in real life mind you. But in my head, in my head I am freaking hilarious! 

You know what's not hilarious? Having a food allergy. Am I am not talking to you folk who choose to avoid certain ingredients in your diet.. I am talking about those people who straight up can not eat dairy, gluten, nuts, shell fish.. the list is exhaustive.

Not being allergic or sensitive to anything, ingredients wise, is something I take for absolute granted. It's not that I don't know there are millions of people out there with crazy, specific food allergies but it's something that doesn't immediately impact me or my family and I never give much thought to it.

Until I have to bake "free from". I know a few recipes that work, I have tried a lot that don't and because I don't understand all the mechanics of free from.. I get stumped. Lucky for me, I have a wealth of knowledge in my friends online and can pop by any one of their amazing blogs and try figure out my way around this unknown world.


(Gluten Free) Almond Cake

150g soft butter (TIP: make it free from dairy by using 150ml vegetable oil)
150g soft brown sugar
2 eggs
180g gound almonds
125g gluten free flour (I used Dove's Farm)
60ml buttermilk (TIP:make it free from diary by using almond milk)
1 teaspoon gluten free baking powder

Preheat your oven to 180C/350F or gas mark 4.
Line a 6/7 inch baking tin with parchment and leave to one side.
Beat the butter (or oil) with the usggar until light and fluffy and add the eggs one at a time.
Fold in the ground almonds, flour and baking powder.
Mix in the buttermilk (or almond milk) gently until fully incorporated.
Scrape out into your lined tin and bake for 35-45 minutes. The top will go golden but the middle might be still wet, use a skewer to test for wetness in the middle.
Allow to cool in the pan before removing it.

Make the jam while the cake is cooking.


Figgy Jam

8 figs halved
1 medium sized lemons worth of lemon juice
125g brown sugar
2 tbsp of butter
2-4 tablespoons of water
Pinch of salt

In a pan- over a medium heat, melt the butter.
Add the sugar and allow it to dissolve.
Toss the halved figs in the lemon juice and water and add the mix the the pan.
Continue to cook over a medium heat until have a chunky jam consistency. Stir occasionally to make sure it doesn't stick or burn.
Add the pinch of salt, remove from the heat and allow to cool.


Putting it all together...

While the cake and jam are cooling, whip one 225g tub of mascarpone cheese and  225ml of single cream together until it reaches soft peaks.

When the jam has cooled remove any large fig pieces, to use in decoration, and fold the jam through the mascarpone/cream mix. Spoon on top of the cooled cake and place the saved figs in the centre.

Slice and serve with utter delight!


This week the GBBO Bloggers baked "free from". There are some amazing things for you all to try over on Kirsty's blog. You 'll find our link up there as she is hosting this week.

Do make sure you stop and by and challenge yourself something!!


31 August 2015

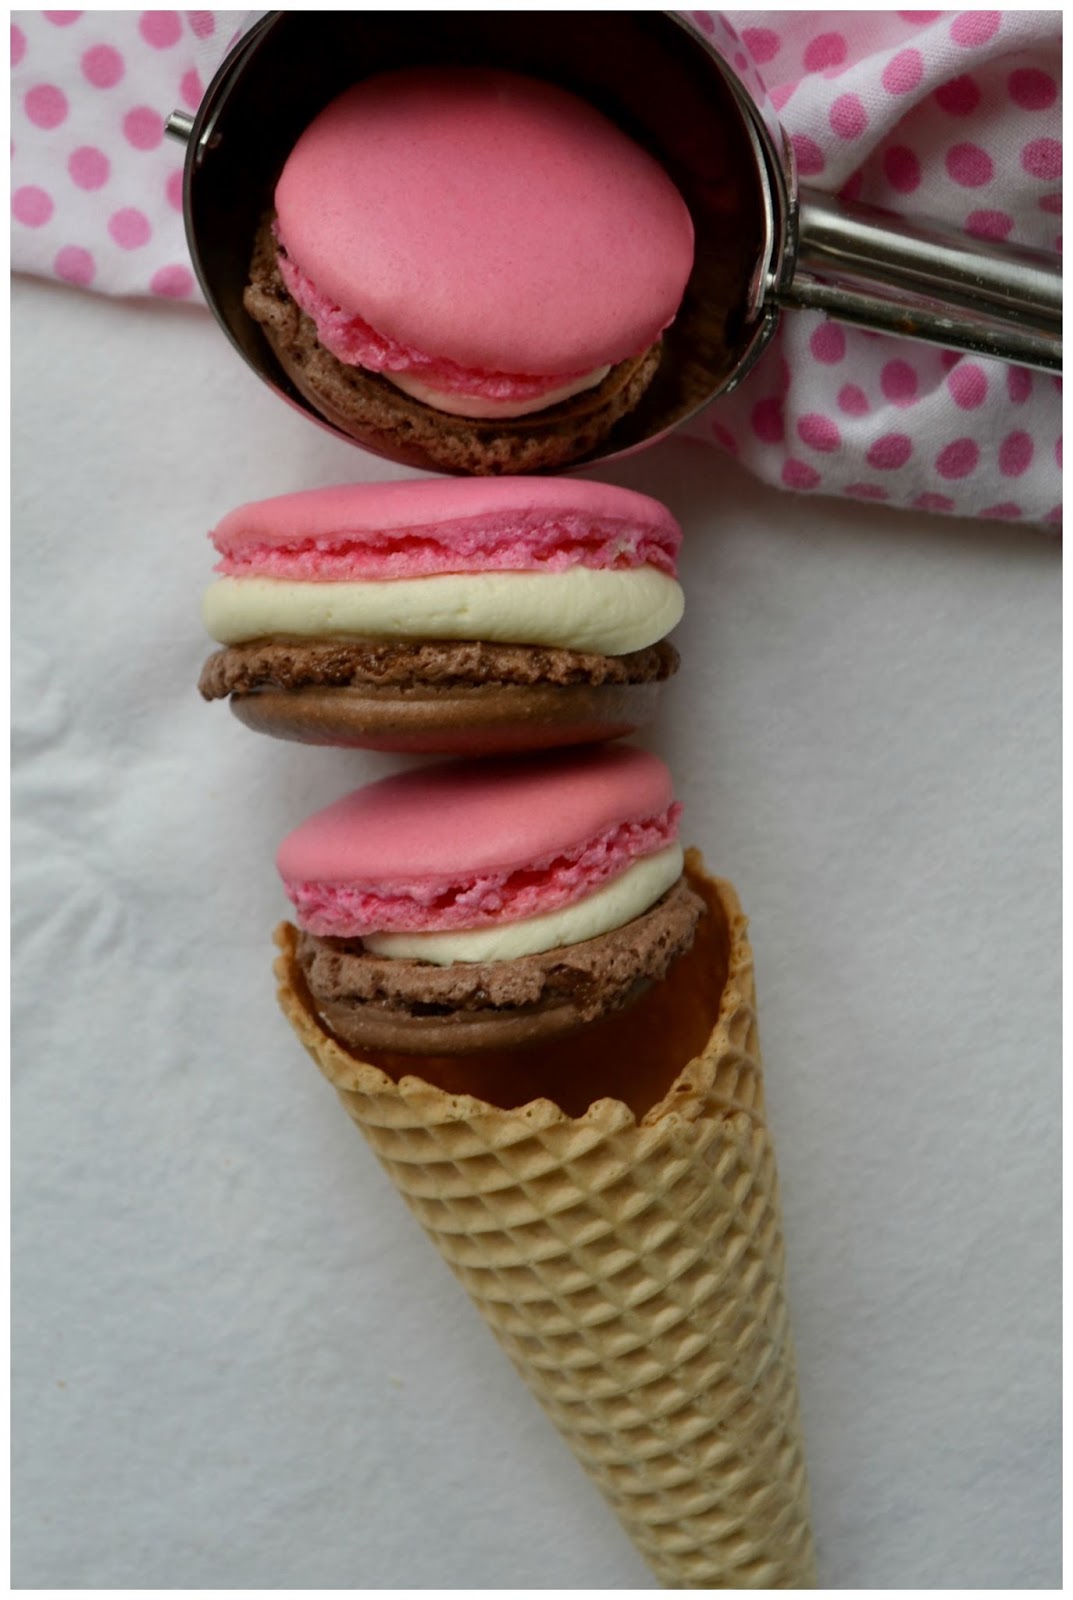
Neapolitan Macarons


It seems sad to say that September is upon us, the summer holidays are over and the kids are heading back to school. And we didn't really get a summer... the weather just never happened. 

One of my favourite  summer memories from home is having a treat after dinner. My Mom used to make us floats; a scoop of vanilla ice cream dumped into a glass of red lemonade. Old school fizzy lemonade, that had crazy amounts of sugar in it. And all manners of E numbers and colouring that are surely not allowed today. The kind that marked a big red ring around your lips. The ice cream fizzed up and this foamy top appeared. It became this tangy, sweet concoction and we loved it. It's one of those memories that, however simple it is in today's terms, is very special. 

Then there were those times when we went out for dinner. Desserts in restaurants were always so much more luxurious than those at home. Kids menus used to have trio's of ice cream, served in a tall glass with cream and cigarellos. I loved it when the waitress would ask you to choose your flavours after she listed them out. That to me was the epitome of swanky... I can choose more than just vanilla?? WOW!

I always chose neapolitan. 


I knew way back then that my sweet tooth was something I'd grow into and put to good use. I knew the restaurants that made their own ice cream, or brought in expensive ice cream as opposed to bog standard tub stuff. I liked to watch how ice cream melted against the wall of the glass. A good ice cream would leave a thick creamy smudge and not wipe of clean when you licked it. If I were lucky, there would be a ripple of chocolate fudge, or flecks of chips in the chocolate. It would be heaven.

As I've grown my tastes have clearly broadened. I still find neapolitan childishly decadent, and will indulge in it purely nostalgically but then.. given my penchant for baking (and procrastibaking) I can also make it into something, nay, anything else I want!!


Neapolitan Macarons

4 aged egg whites (Leave them covered over in a bowl on your counter over night- up to 24 hours.)
100g caster sugar
150g ground almonds
280g icing sugar
1/4 teaspoon strawberry essence
squirt pink food gel, or splash of pink food colouring
2 tbsp coco powder

Start with a clean, grease free mixing bowl and an electric mixer. 

On a high speed, whip your egg whites until soft peaks form. Continue whipping the egg whites on a high speed and start pouring the caster sugar into the mixing bowl. I start off with a slow and steady stream and stop after 1/3 has gone in. I let it whip for a while and start again, adding another 1/3 and then stopping pouring sugar. Repeat for the third batch. 

Continue whipping for a further 3-4 minutes until your egg whites form a thick and glossy stiff peaked meringue. 


Sieve together the icing sugar and ground almonds into a large bowl and discard any large lumps or bumps you found were too big to go through the sieve. 

Taking a spatula, fold the egg whites into the almond, dry mixture. Just a couple of folds at first. You need to them split your mixture in half. To half the mixture add the coco powder and to the other add the strawberry essence and pink food colouring.

Fold both your mixtures separately until fully combined. Remember: your aim now is to squash out any air in the meringue. You can be rough with your folds, just make sure to keep folding through, making sure all the dry mix has been incorporated into the meringue. Continue to the  “thick ribbon” consistency. Essentially that means the mix almost falls back on itself in around 10 seconds.

Line a few baking trays with parchment, and using your template, pipe circles onto the tray. I use a silicone macarons mat as a guide, under my parchment paper to pipe my macarons shells to size.

Holding your tray about a foot off above the counter top or table you are working at... drop it! Repeat this procedure a few times to pop any air bubbles left in your shells and allow the circles to settle. 

Now leave the shells to rest so that they form a skin and have become dry enough on the outside that you can lightly touch them.  This process could take up to an hour. (TIP: Leave them in a warm part of your house, like the windowsill where the sun is shining in.. they’ll be dry in no time!)


Preheat your oven to 130’. Once the macarons are ready for the oven,  pop them in for 8 minutes. After the 8 minutes, insert a wooden spoon into the oven door to keep it a little bit open. Continue baking for another 4-6 minutes until the top of the shell is crisp and if you wiggled it, gently, from side to side it should be one piece!

Remove from the oven onto a cooling tray and cool completely before filling. Continue baking whatever other shells are left in the same way. 


I filled these little confection perfections with my badass buttercream. That became the middle vanilla filling of the 'ice cream'. None of the flavours over power each other. They just come together in bite size morsels of mmmm...

You could of course, fill it with actual vanilla ice cream. But then.. lazy here went with frosting.


Link up your recipe of the week

27 August 2015

Creme Brulee Baked Cheesecake


I always find that when I am milling about the house, doing a hundred different things my mind is at it's clearest. I know that probably makes no sense in any real terms but when I have a few jobs to do I make a list. I hop from item to item on the list, marking off as I go. The marking off brings that clarity. It seems to be once there's one less think to think about, I can think more freely.

And it's then that I come up with random cake or bake ideas. 

I have a book, I put them in. Most never come to fruition because of reasons like.. I don't have the money for that amount of gold leaf, or I'm not sure that ingredient has been invented yet or... Am no, just no!

Now I am not saying that this Baked Cheesecake notion is new or even mine. But it did pop into my head while I was thinking about dessert week on this weeks Great British Bake Off. This weeks task was Creme Brulee, Cheesecake or Windtorte.

Creme Brulee or Cheesecake.. Creme Brulee... or Cheesecake... Finkle and Einhorn... 

CREME BRULEE CHEESECAKE! 

And as I mentally patted myself on the back for my ingenuity, I started making a new list.. of ingredients and things to add to the pantry.  Because damn.. I had such a good feeling about this!

Creme Brulee Cheesecake it was to be.


This super rich, creamy and oh-my-goodness-get-in-my-belly baked cheesecake is genuinely the best I have ever made. I have never really had any huge success with baked cheesecakes. They either crack, sink and fall in all the places you don't want them to. I scoured Pinterest looking for tips on handling a baked cheesecake and was pleasantly surprised with how little I had to change. With a few easy steps I was able to use my own recipe, the one I like the taste of, to get it perfect.

And I mean perfect when I say it. This is me blowing my cheesecake trumpet here.. Toot! Toot! Toot! Leaving the brulee aside, this baked vanilla cheesecake is the bees knees.


Creme Brulee Baked Cheesecake

The Biscuit Base/ The Crust
300g (crushed to crumbs) digestive biscuit
3 tbsps of demerara sugar
125g butter, melted

Preheat your oven to 190C/375F.
In a medium bowl mix together the crumbs, butter and sugar and press into a 9 or 10 inch round spring form tin.
Bake for 91-2 minutes until the crumbs have set and turned a dark golden colour.
Allow to cool fully. (Pinterest TIP #1; Allowing the crust to cool down significantly).

The Vanilla Filling
Three (3) 225g packets of full fat cream cheese
60ml of double cream
2tbsps of flour
pinch of salt
300g caster sugar
4 large eggs
the seeds from one vanilla pod

Reduce the oven to 150C/300F/Gas Mark 2.
Beat the cream cheese, double cream, flour and salt until smooth and fluffy.
Add the sugar and continue until smooth.
Add the vanilla, then the eggs one at a time, mixing in the next after the last yolk has been incorporated.
Beat all the ingredients until smooth, ensuring there are no lumps or bumps.
Pour into the cooled crust.

(Pinterest TIP #2) Sit the springform tin in a large baking sheet, that has sides to allow you to fill the baking sheet with water. Fill your baking sheet with boiling hot water, about 1/3 the way up the cheesecake tins wall.
Put the whole lot in the oven for 50-55 minutes. Until the top has turned golden and when you move it, the centre jiggles a little bit.

Crack open the oven after the time alloted with a wooden spoon. Turn the oven off and allow the cheesecake to cool fully in the oven. Remove from the oven and refrigerate overnight.

Eat, as is the next day or brulee the top like I did.


Brulee:
Now I know that on the show.. you weren't allowed use a blowtorch. But guess what.. I'm not on that show. I did my time in the tent.. I will Creme Brulee the top of whatever I want, the way want to.

Sprinkle two tablespoons of sugar over the top of the baked and cooled cheesecake and just let at it with a kitchen blowtorch. Make sure you evenly coat the top of the cheesecake with sugar, and then use the blowtorch evenly to burn it. I over browned mine in spots but that crisp caramel texture was really good throughout.

As too was cutting through the top and getting the "crunch".. That audible crisp; that is basically the signature sound of Creme Brulee.


Once again I am linking up Jenny of Mummy Mishaps and with the wonderful bloggers of Great Bloggers Bake Off.

This week the lovely Michelle of Utterly Scrummy Food For Families is our host. Make sure you pop by over the next while and see what all the other bloggers have baked in homage to this weeks Bake Off.


Copyright © Procrastibake | Theme by Neat Design Corner |